
- 1-Understanding-Tubeless-Tires
- 2-Essential-Tools-for-Tubeless-Setup
- 3-Step-by-Step-Setup-Guide
- 4-Adjusting-and-Maintaining-Tubeless-Tires
- 5-Common-Challenges-and-Solutions
- 6-Case-Studies-and-Real-Life-Experiences
- 7-Choosing-Reliable-Tools-and-Accessories
- 8-Pro-Tips-for-Long-Term-Tubeless-Success
1. Understanding Tubeless Tires
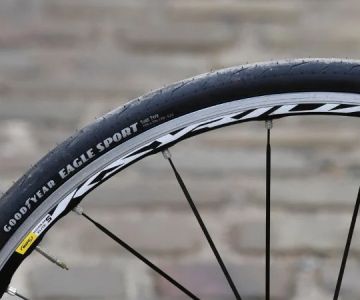
Tubeless tires have become increasingly popular among road cyclists and mountain bikers due to their ability to reduce punctures, improve ride comfort, and allow for lower tire pressures. Unlike traditional tires that require inner tubes, tubeless systems rely on a sealed rim and a liquid sealant to maintain air pressure.
The benefits include:
- Reduced risk of pinch flats, which commonly occur with inner tubes.
- Enhanced traction through lower tire pressure adjustments.
- Lighter weight compared to traditional tube setups.
However, setting up and adjusting tubeless tires requires specific tools and careful technique. Understanding these systems is the first step to avoiding frustrating leaks and ensuring a reliable ride.
2. Essential Tools for Tubeless Setup
Having the right tools is crucial for efficient and stress-free tubeless tire installation. Here are the most essential items every cyclist should have:
2.1 Tubeless Valve Stems
High-quality tubeless valves are essential for maintaining a reliable seal. They come in Presta or Schrader types depending on your rim compatibility. Investing in durable valves ensures long-term performance and reduces the likelihood of leaks.
2.2 Sealant
Sealant is a liquid that fills tiny gaps in the tire bead and provides puncture protection. Popular sealants can seal holes up to 6mm instantly. It is vital to measure the correct quantity based on tire size and periodically check sealant levels.
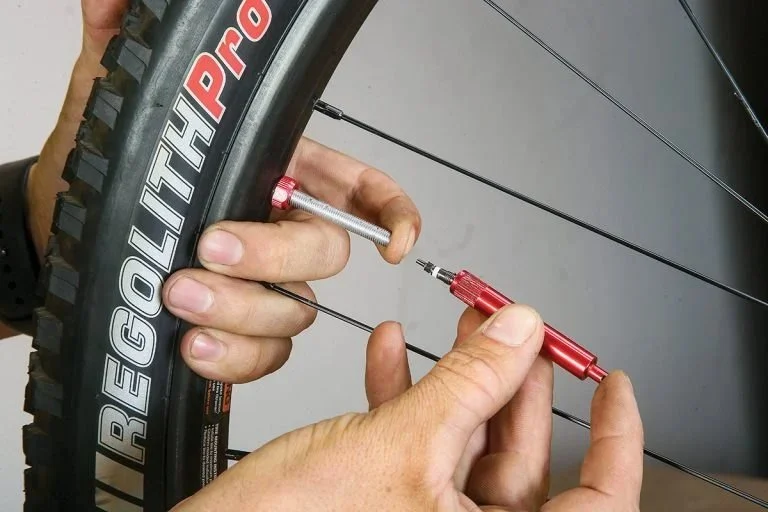
2.3 Valve Core Remover
This tool helps remove or tighten the valve core, allowing faster sealant injection or replacement. Many inflators or tubeless pumps include a built-in core remover, making the process easier.
2.4 Bead Seating Tools
Some tires, especially new ones, are difficult to seat properly on the rim. Bead seating tools or high-volume floor pumps can help inflate the tire rapidly, allowing the beads to lock securely.
2.5 Rim Tape
Rim tape seals the spoke holes and prevents air from escaping. It’s critical to choose tape width matching your rim specifications. High-quality tape is more resistant to punctures and ensures consistent air retention.
3. Step-by-Step Setup Guide
With the right tools, the tubeless setup process becomes straightforward. Below is a detailed guide for effective installation:
3.1 Prepare the Rim
Ensure the rim is clean and dry. Apply the tubeless rim tape carefully, covering all spoke holes and overlapping slightly at the valve position. Press firmly to avoid wrinkles that could cause leaks.
3.2 Install the Valve
Insert the tubeless valve into the rim and secure it with the lock nut. Double-check that the valve sits straight to avoid sealant leaks.
3.3 Mount the Tire
Place one side of the tire bead on the rim, followed by the second side. Use plastic tire levers if necessary, but avoid excessive force to prevent bead damage.
3.4 Add Sealant
Remove the valve core if using liquid sealant. Pour the recommended amount into the tire, then reinstall the valve core. Rotate the wheel to distribute the sealant evenly along the inner tire surface.
3.5 Inflate and Seat the Bead
Use a high-volume pump or tubeless inflator to quickly inflate the tire. You should hear the bead "pop" into place along the rim. Ensure both sides are properly seated, and check for leaks by spraying soapy water on the tire-rim interface.
4. Adjusting and Maintaining Tubeless Tires
Once installed, tubeless tires require routine adjustment and maintenance for optimal performance.
4.1 Checking Pressure
Use a precise floor pump or digital gauge to monitor tire pressure. Adjust pressure based on terrain and rider weight. Lower pressures improve traction off-road, while higher pressures reduce rolling resistance on roads.
4.2 Replenishing Sealant
Sealant dries over time, typically every 2–6 months. Remove the valve core to top up sealant without fully dismounting the tire, keeping maintenance simple and efficient.
4.3 Re-Seating the Bead
Occasionally, tires may lose bead integrity due to impacts or punctures. Tools like bead jacks or high-volume pumps help reseat tires without removal, ensuring safety and air retention.
5. Common Challenges and Solutions
Even experienced cyclists encounter common tubeless issues. Here’s how to tackle them:
5.1 Air Leaks at the Rim
Most leaks are caused by improper rim tape or valve installation. Ensure tape is flush and valves are tightened. Applying sealant around the valve base can also help seal minor gaps.
5.2 Difficulty Seating the Tire
New tires or tight-fitting rims may resist seating. Using a high-volume pump or compressed air can snap the bead into place. Alternatively, a simple tire lever and sealant lubrication may ease installation.
5.3 Punctures Beyond Sealant Capacity
Large cuts may exceed the sealant’s ability to self-repair. Tubeless plugs or a tube conversion kit are recommended as emergency solutions for remote rides.
6. Case Studies and Real-Life Experiences
James, a trail enthusiast in Colorado, struggled with frequent pinch flats on his mountain bike. Switching to tubeless tires with the right setup tools from Cycling Guider transformed his riding experience. He reported fewer flats and smoother handling on technical descents.
In another scenario, Sarah, a commuter cyclist in California, initially faced air leaks due to improper rim tape installation. With professional-grade tubeless tools and step-by-step guidance, she mastered the setup and maintained consistent tire pressure without leaks for an entire season.
7. Choosing Reliable Tools and Accessories
Investing in quality tools ensures hassle-free installation and adjustment. Recommended items include:
- High-volume floor pumps for quick bead seating
- Professional-grade sealants with long shelf life
- Durable tubeless valve stems compatible with your rim type
- Rim tape that matches the rim width and resists punctures
Brands available at Cycling Guider provide both beginner-friendly kits and professional-grade accessories to suit all levels of cyclists.
8. Pro Tips for Long-Term Tubeless Success
- Regularly rotate your tires to distribute sealant evenly.
- Keep a small tubeless repair kit on rides for quick fixes.
- Track sealant replacement schedules to avoid dry tires.
- Monitor tire bead integrity, especially after crashes or impacts.
- Educate yourself on terrain-specific pressure adjustments for optimal traction.
By combining the right tools, proper setup, and consistent maintenance, cyclists can fully enjoy the benefits of tubeless tires with minimal interruptions and maximum safety.


 The Fitting Room5.0 (41 reviews)
 Adventure Cycling4.0 (453 reviews)
 Woodinville Bicycle4.0 (164 reviews)
 The Garage Bike Shop5.0 (66 reviews)
 Nebraska Electric Powersports5.0 (2 reviews)
 Atomic Cycles4.0 (139 reviews)
 How to Teach Kids to Ride a Bike: A Step-by-Step Guide for Parents
 Tips for Riding on Busy City Streets: Smart Strategies for Urban Cyclists
 Best US National Parks for Mountain Biking: Ride Epic Trails Across America
 Best Aero Helmets for Time Trials and Racing
 How to Clean and Lubricate Your Bike Chain Like a Pro
 10 Must-Have Items for Long-Distance Cycling Trips