
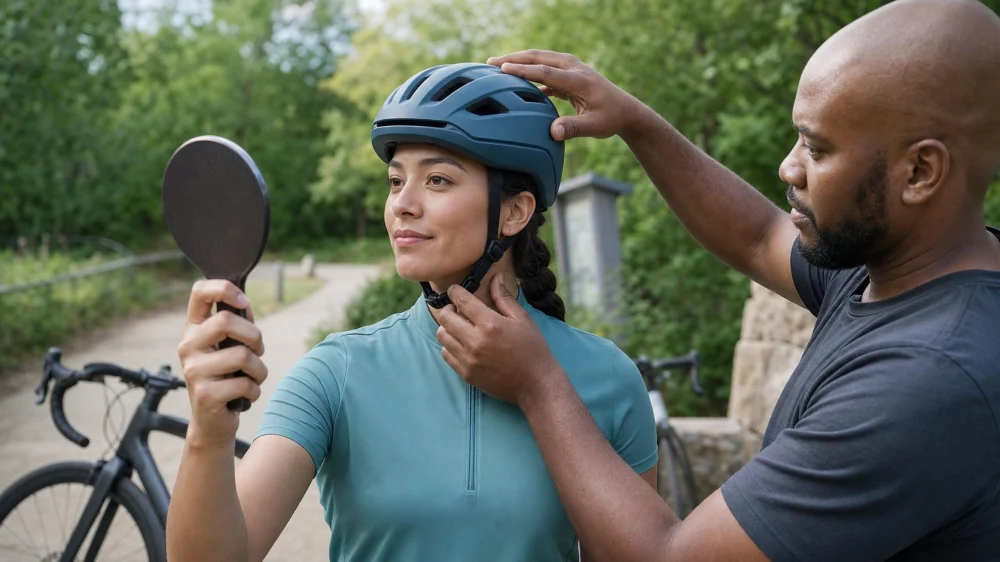
Bike Helmet Fit: Position, Straps, and Replacement Checks
On this page
Quick answer
A bicycle helmet should match your head size, sit level and low on the forehead, and remain stable when you shake your head. Adjust side straps into a V around each ear and buckle the chin strap snugly. Follow the helmet maker's instructions, replace a helmet after an impact, and stop using one with cracks, damaged straps, missing parts, or a recall.
This guide is for adult recreational cyclists in the United States. Children, competitive disciplines, speed pedelecs, downhill riding, and other activities may require different helmet types or rules.
Choose the correct size and standard
Start with the label and instructions inside the helmet or packaging. A bicycle helmet sold in the United States should carry required manufacturer and certification information, but a label alone does not make the wrong size fit.
- Measure head circumference where the helmet will sit, following the maker's sizing method.
- Try the indicated size and any adjacent size when you are near a range boundary.
- Place it level before tightening the rear fit system or pads.
- Check for even contact without painful pressure points or large gaps.
- Confirm the shell shape works with your head; another model may fit better even at the same labeled size.
Do not buy a child an oversized helmet to “grow into.” Do not wear a thick hat, bulky hairstyle, or accessory beneath the helmet unless the manufacturer says it is compatible.
Check the current CPSC bicycle helmet recalls using the brand, model, date, and other label details before using a secondhand or unfamiliar helmet.
Fit the helmet step by step
Use the manufacturer's instructions first. The following sequence reflects current federal bicycle-safety guidance:
- Level the shell: Position the front edge low on the forehead, roughly one or two finger widths above the eyebrows, without tilting it back.
- Set the internal fit: Adjust pads or the retention dial until the helmet feels snug around the head without causing pain.
- Place the side sliders: The front and rear straps should meet in a V just below and slightly in front of each ear.
- Center the buckle: Keep the chin strap flat and untwisted, with the buckle positioned as designed.
- Tighten the chin strap: It should be snug enough that only limited finger space remains, following the maker's fit check.
- Test movement: Shake your head gently and open your mouth. The helmet should stay level and move with your skin rather than slide freely.
Recheck earlier adjustments after tightening the chin strap. Strap changes can pull the helmet backward or create slack on one side.
Run a check before every ride
- The shell sits level and low, not pushed back.
- The retention system is snug and has not loosened.
- Side straps form a balanced V around each ear.
- The buckle closes fully and the chin strap is flat.
- Loose strap ends are secured according to the design.
- No cracks, compressed foam, broken anchors, frayed webbing, or missing pads are visible.
- Lights, cameras, visors, or accessories are manufacturer-approved and do not interfere with fit.
Repeat the fit check after transporting the helmet, changing a hairstyle or head covering, lending it, or adjusting a rear light. A helmet hanging from handlebars or a bag can have straps pulled out of position.
Know when to replace the helmet
Replace a helmet after it receives an impact in a crash or fall. Damage that reduces protection may be hidden inside the foam even when the outside looks acceptable. Follow the manufacturer's post-impact instructions rather than trying to repair it.
Also stop using and replace or obtain manufacturer guidance when:
- The shell, foam, buckle, strap anchor, retention system, or other structural part is cracked, crushed, broken, or missing.
- Straps are cut, badly frayed, chemically damaged, or cannot hold adjustment.
- The helmet no longer fits securely.
- It was exposed to damaging heat, solvents, cleaners, or other conditions listed by the maker.
- The model is recalled or its certification label cannot be verified.
- The manufacturer recommends replacement based on age, use, or condition.
Avoid a used helmet with unknown crash, storage, modification, or recall history. Cosmetic appearance cannot confirm internal condition.
Helmet fit checklist
- Correct activity type and size range.
- Required label and readable model information.
- No open recall for the exact model.
- Level, low forehead position.
- Even, snug contact without pressure pain.
- Side straps meet around each ear.
- Chin buckle fully latched and strap snug.
- Helmet stays in place during gentle movement.
- No impact history or structural damage.
- Only approved accessories and cleaning methods.
Best fit: secure and comfortable enough to wear correctly for every ride. Not ideal: a helmet that needs to be pushed back for comfort, rocks despite adjustment, or depends on an unapproved insert.
Limitations and important notes
No helmet can prevent every head or brain injury, and a helmet does not replace crash prevention, visible riding, bicycle maintenance, traffic-law compliance, or appropriate skills.
This article cannot confirm a particular helmet's authenticity, condition, certification, or compatibility. Use the manufacturer's instructions and contact the manufacturer or a knowledgeable retailer when labels, parts, fit, or impact history are uncertain.
After a crash, call emergency services for loss of consciousness, seizure, worsening headache, repeated vomiting, confusion, weakness, neck pain, severe bleeding, or other urgent symptoms. A damaged helmet is not a diagnostic tool; seek appropriate medical evaluation.
Frequently asked questions
Should a bike helmet cover the forehead?
It should sit level and low, generally one or two finger widths above the eyebrows according to federal fit guidance, while following the model's specific instructions.
How tight should the chin strap be?
It should lie flat and be snug enough to limit slack while allowing normal breathing and jaw movement. Use the helmet maker's exact fit test.
Can I keep a helmet after a minor fall?
If the helmet received an impact, replace it or follow the manufacturer's post-impact program. Internal damage may not be visible.
Can I clean a helmet with household cleaner?
Only use methods and products approved by the manufacturer. Some cleaners and solvents can damage components without obvious signs.
Is an expensive helmet automatically safer?
Price does not replace correct certification, condition, fit, and proper wear. Extra features may affect comfort or use, but the helmet still needs to fit securely.
Sources and evidence notes
The impact-replacement warning and instruction requirements in this guide follow current CPSC bicycle-helmet guidance. The level position, forehead placement, V-shaped side straps, and snug chin-strap approach reflect current NHTSA fit guidance. Manufacturer instructions remain specific to each model.
Conclusion and next steps
Verify the helmet label and recall status, then fit it level and low with balanced side straps and a snug chin buckle. Run the stability and damage check before every ride. Replace it after any impact or when structural parts, fit, recall status, or history make protection uncertain.






 Rogan E-Bikes - St. Petersburg4.0 (23 reviews)
 Mcgregor Partners Co.0.0 (0 reviews)
 Sneakers & Spokes4.0 (50 reviews)
 Cycle Sport4.0 (94 reviews)
 Bicycle Czar4.0 (39 reviews)
 Trek Bicycle Store of Charlotte4.0 (502 reviews)
 How to Teach Kids to Ride a Bike: A Step-by-Step Guide for Parents
 Tips for Riding on Busy City Streets: Smart Strategies for Urban Cyclists
 Best US National Parks for Mountain Biking: Ride Epic Trails Across America
 Best Aero Helmets for Time Trials and Racing
 How to Clean and Lubricate Your Bike Chain Like a Pro
 10 Must-Have Items for Long-Distance Cycling Trips