
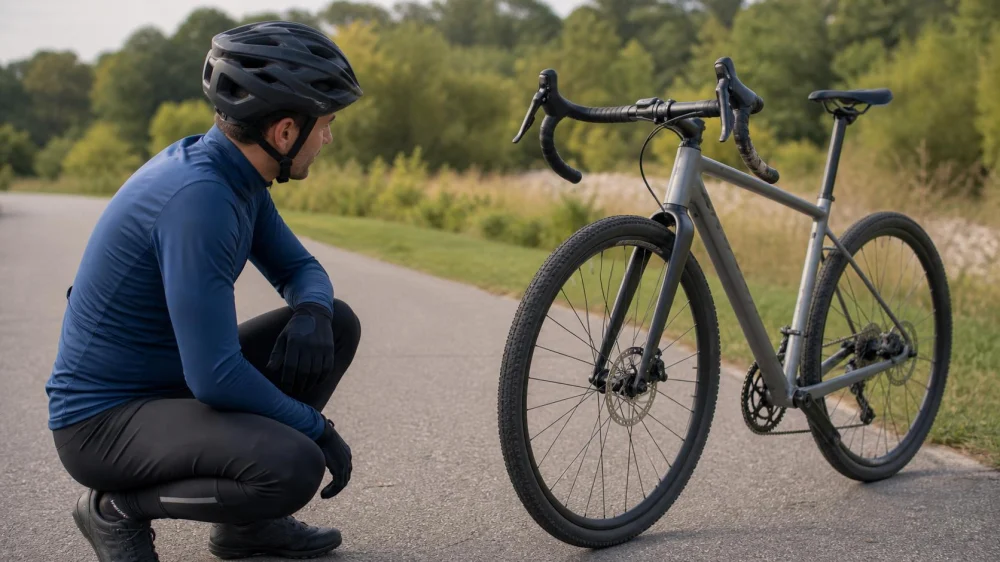
Bike Handlebar Twisted After a Fall: Stop and Check
On this page
Quick answer
If the handlebar looks twisted after a fall, do not ride until you know what moved and whether anything is damaged. Move out of traffic, check yourself first, then compare the front wheel, stem, and handlebar without force. Look for cracks, dents, slipping, loose headset, damaged controls, pinched hoses, or restricted steering. Walk the bike or arrange transport when alignment or structural condition is uncertain.
This guide is for common adult bicycles. A visual check cannot prove that a part is safe, especially with carbon composites or after a high-energy impact. Follow component torque and inspection instructions and use a qualified mechanic.
First response after a fall
- Protect the scene. Move yourself out of vehicle, rider, and trail traffic if you can do so safely. Warn others about the hazard.
- Check the rider before the bike. Do not immediately remount. Assess head impact, neck or back pain, bleeding, dizziness, confusion, breathing, and limb function. Seek emergency help for serious symptoms.
- Do not straighten by reflex. A crooked appearance can come from the stem turning on the steerer, handlebar rotating in the stem, wheel damage, fork damage, or frame deformation.
- Record the impact. Note which side hit, approximate speed, whether the wheel struck an obstacle, and which controls contacted the ground.
- Move the bike gently. Lift or roll only if wheels turn freely and doing so does not drag a damaged cable, hose, or component.
A low-speed tip-over and a vehicle collision are not equivalent. When the impact was strong enough to damage a helmet, fork, wheel, frame, or roadside object, use a more conservative inspection threshold.
Check alignment without forcing it
Place the bicycle on level ground. Stand in front without putting your face over sharp or tensioned parts. Center the front wheel visually between the fork legs and compare its direction with the stem and handlebar.
Check three relationships:
- Wheel to fork: Is the wheel seated correctly and centered? Are the axle or retention system and brake rotor aligned?
- Stem to wheel: Does the stem point in the same direction as the front wheel, or has it rotated around the steerer?
- Handlebar to stem: Has the bar rolled forward or backward in the clamp? Are reference marks exposed or uneven?
From the rider position, compare lever angle, grip or hood height, and handlebar symmetry. One control may have rotated on the bar without the bar itself moving.
Do not trap the front wheel between your knees and yank the handlebar into place. That can hide a damaged clamp, exceed component limits, disturb headset preload, or create a new fault. Proper correction requires identifying the joint, loosening the right fasteners, inspecting parts, aligning, and tightening in the specified sequence and torque.
Look for damage and control problems
Use bright light and clean only enough dirt to see the surface. Inspect:
- handlebar near the stem clamp, bends, control clamps, ends, and impact points;
- stem body, faceplate, bolts, steerer clamp, and any gap markings;
- steerer and headset area for looseness, binding, noise, or displaced spacers;
- fork crown, legs, dropouts, and brake mounts;
- front wheel rim, spokes, hub, axle, tire, and rotor;
- brake levers, shifters, grips, hoods, and bar-end plugs;
- cables, housing, hydraulic hoses, electronic wires, and e-bike display or controls; and
- frame head tube, top tube, down tube, and cable-entry areas.
Look for cracks, splinters, white stress marks, dents, ripples, gouges, sharp burrs, paint flaking at a joint, fluid, crushed housing, pulled connectors, and parts that move under hand pressure.
With the front wheel on the ground, gently apply the front brake and rock the bike. A knock at the headset area can indicate play, but brake pad or suspension movement can imitate it. Turn the bars slowly from side to side; steering should be smooth and cables should not tighten or pull the brake.
When the bicycle is a no-ride
Walk or transport the bicycle rather than riding when:
- alignment is visibly wrong and the cause is not identified;
- the handlebar, stem, fork, steerer, frame, or wheel shows a crack, dent, split, deep gouge, delamination, or deformation;
- any clamped part slipped despite correct prior setup;
- the headset is loose, notchy, binding, or displaced;
- the front wheel is loose, mis-seated, rubbing badly, or out of true;
- brakes are weak, leaking, dragging, or their lines are damaged;
- shifting, e-bike wiring, or controls interfere with steering;
- bar ends are open or sharp;
- fasteners are missing, bent, or visibly pulled; or
- the bike crashed at speed or into a vehicle and cannot receive a full inspection on site.
Do not perform a test ride to decide whether a questionable steering part will hold. A sudden handlebar, stem, fork, or front-wheel failure can cause immediate loss of control.
What to tell the bike shop
Provide the bicycle make and model, component material, impact side, speed estimate, surface, whether the wheel stopped abruptly, and any parts that contacted the ground. Mention previous crashes, recent cockpit or headset service, transport damage, and torque history if known.
Show photos taken before moving or adjusting anything. Point out new sounds, steering restriction, brake rub, lever change, wheel wobble, or control misalignment.
Ask the mechanic to inspect the full steering and front-wheel system, not merely realign the bar. Depending on the bike, that may include removing clamped parts, checking steerer and fork surfaces, assessing carbon components under manufacturer criteria, inspecting headset bearings, verifying wheel retention, testing brakes, and applying specified torque with an appropriate tool.
Request documentation of any replacement recommendation. A part can look cosmetically acceptable while no longer meeting the manufacturer’s reuse criteria.
Material limits and mistakes to avoid
Carbon fiber, aluminum, steel, and titanium fail and show damage differently. Do not use a tap test, coin sound, flex test, magnet, or internet photo comparison as proof that a component is safe. Carbon can conceal internal damage; metal can be weakened by a bend even if it is pushed back.
Do not straighten a bent handlebar, stem, fork, or steerer for continued riding unless the manufacturer explicitly provides a repair process—which is uncommon for safety-critical cockpit parts. Replacement is often the appropriate response to structural deformation.
Do not guess torque or use a long wrench without control. Too little clamping can allow slipping; too much can crush or crack components. Cleanliness, assembly compound, fastener sequence, and compatible diameters also matter.
Helmet assessment is separate. Replace or inspect it according to the helmet maker after an impact, even if the bicycle damage looks minor.
Frequently asked questions
Why is the handlebar crooked while the wheel looks straight?
The stem may have rotated on the steerer, the bar may have rotated in the stem, a control may have shifted, or a component may be bent. Identify the relationship before adjustment.
Can I loosen the stem and realign it myself?
Only if you understand the headset and stem system, have the correct torque information and tools, and first rule out damage. Otherwise use a mechanic.
Is a small scratch dangerous?
Surface scratches can be cosmetic, but depth, location, material, and impact matter. A qualified inspection is needed when the scratch is deep or near a clamp or stress area.
Can I ride slowly home?
Not when steering, braking, wheel retention, or structural integrity is uncertain. Walking or transport avoids testing a potential failure with your body.
Why does the steering feel tight after the fall?
A cable or hose may be pulled, the headset may be damaged or over-preloaded, the fork may be misaligned, or another part may be contacting. Do not ride.
Should the bike be checked after a simple tip-over?
Yes, at least perform a pre-ride function and damage check. Control levers, bar ends, derailleur, pedals, and alignment can shift even at low speed.
Sources and evidence notes
NHTSA advises riders to check the bicycle’s fit and function, including handlebars, brakes, tires, and seat, before riding. See NHTSA bicycle equipment safety tips.
Component-specific inspection, replacement, assembly, and torque limits must come from the bicycle and component manufacturers. General visual clues in this article do not certify a crashed part for reuse.
Conclusion and next steps
After a fall, check yourself first and move to safety. Compare the wheel, stem, bar, and controls without forcing alignment. Inspect the entire steering, fork, brake, and front-wheel path. Any unexplained slip, crack, dent, looseness, binding, leak, or wheel problem is a no-ride condition; transport the bike for a full inspection.






 Truckawa Bicyles5.0 (3 reviews)
 Blue Mountain E-Bikes5.0 (28 reviews)
 BikeMax4.0 (104 reviews)
 Grand Performance4.0 (92 reviews)
 Mega Cycle4.0 (244 reviews)
 Brickwell Cycling and Multisports4.0 (51 reviews)
 How to Teach Kids to Ride a Bike: A Step-by-Step Guide for Parents
 Tips for Riding on Busy City Streets: Smart Strategies for Urban Cyclists
 Best US National Parks for Mountain Biking: Ride Epic Trails Across America
 Best Aero Helmets for Time Trials and Racing
 How to Clean and Lubricate Your Bike Chain Like a Pro
 10 Must-Have Items for Long-Distance Cycling Trips