
Why You Should Use a Bike Repair Stand at Home
Having a bike repair stand at home can greatly enhance your bike maintenance routine. Whether you're a seasoned cyclist or a beginner, using a bike repair stand makes repairs and adjustments easier and more efficient. It allows you to work on your bike at a comfortable height, providing stability and control while performing tasks such as wheel truing, brake adjustments, and gear tuning. Plus, you won't have to deal with the hassle of transporting your bike to a shop every time a minor issue arises.
Essential Tools for Using a Bike Repair Stand
Before you start working on your bike with a repair stand, it’s important to have the right tools. Here’s a list of essential tools that you’ll need to get the most out of your bike repair stand:
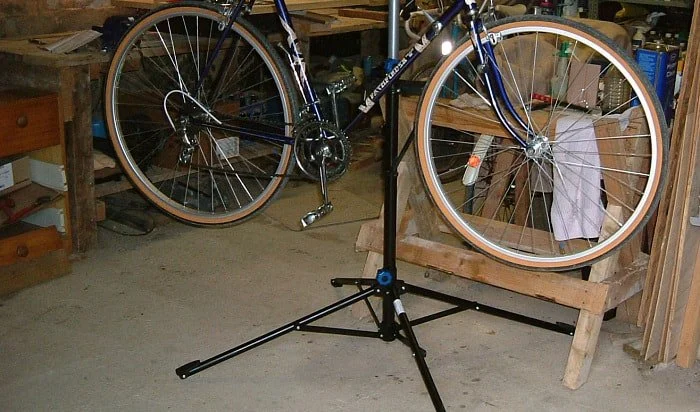
- Bike Repair Stand: Of course, the centerpiece of your setup is the bike repair stand itself. There are several types available, including clamp-style and frame-mount models. Choose one that fits your bike’s frame and is sturdy enough to hold it while you work.
- Wrenches and Sockets: A set of adjustable wrenches or a socket wrench kit is crucial for tightening or loosening various bike components, such as bolts and nuts on the handlebars, wheels, and seat post.
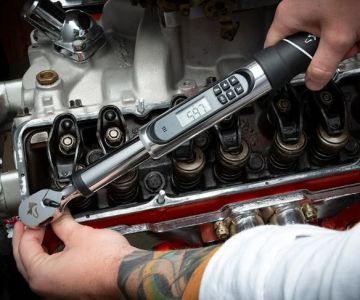
- Torque Wrench: For precision tightening, a torque wrench is essential, especially for delicate parts like the stem or seat post. It ensures you don’t overtighten and damage components.
- Chain Tool: A chain tool is needed for repairing or replacing a broken chain. It allows you to remove and install chain links with ease.
- Hex Keys/Allen Wrenches: These are used for adjusting most components on modern bikes, such as brake calipers, handlebars, and derailleurs.
How to Set Up Your Bike Repair Stand Correctly
Setting up your bike repair stand correctly is essential for performing repairs efficiently. Follow these steps to ensure you have a stable and comfortable working environment:
- Choose the Right Location: Select a flat, level surface for your bike repair stand. A solid workbench or floor is ideal, as an uneven surface can make the repair process more difficult.
- Adjust the Height: Most bike repair stands are adjustable to suit your height. Adjust the stand so that your bike is at a comfortable working height, typically at waist level. This will prevent back strain and give you better control while working.
- Secure the Bike: When placing your bike on the repair stand, make sure the clamp is securely holding the frame. Be careful not to damage your bike’s frame by over-tightening the clamp. Check that the bike is stable before starting any repairs.
- Organize Your Tools: Keep your tools within easy reach by using a tool tray or pegboard. Having your tools organized ensures that you can quickly grab what you need during repairs.
Common Bike Repairs You Can Do with a Repair Stand
Once your bike repair stand is set up, you’ll be able to tackle a variety of common bike repairs with ease. Here are some tasks you can perform with your stand:
- Wheel Truing: A repair stand makes it much easier to check and adjust wheel trueness. Simply mount your wheel on the stand and use a truing tool to check for any wobbling or misalignment.
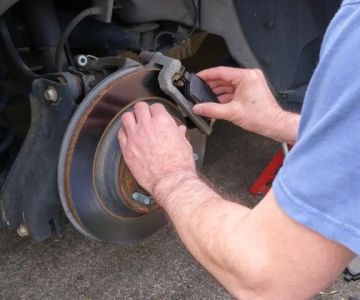
- Brake Adjustments: Use the repair stand to adjust your bike’s brakes. You can check brake pad alignment, tighten the cables, or replace worn-out brake pads.
- Chain Maintenance: Perform chain repairs or replacements with ease by using a chain tool to remove and replace links. You can also clean and lubricate the chain while it’s mounted on the stand.
- Gear Tunings: Fine-tune your bike’s gears by adjusting the derailleurs and cable tension while the bike is securely mounted on the stand.
Real-Life Case: Fixing a Bike at Home with a Repair Stand
James, an avid cyclist, used to struggle with bike repairs, often having to take his bike to the shop for simple issues like brake adjustments or wheel truing. After purchasing a bike repair stand, James was able to fix his bike at home with ease. He set up his stand in his garage, adjusted it to the perfect height, and found that working on his bike became much faster and more enjoyable. With the right tools, he was able to replace his brake pads, adjust his gears, and even true his wheels, all in the comfort of his home.
Conclusion: Make Bike Repairs Easy with a Bike Repair Stand
Using a bike repair stand at home can transform your approach to bike maintenance. With the right tools and setup, you can perform a wide range of repairs and adjustments, saving both time and money. Whether you’re a seasoned cyclist or just getting started, a bike repair stand is an invaluable tool for keeping your bike in top condition. For expert recommendations on bike repair stands and tools, visit Cycling Guider for the best products and tips on home bike maintenance.


 Fox River Sports4.0 (40 reviews)
 CZJB MOTOR5.0 (1 reviews)
 Chesterton Bicycle Station4.0 (59 reviews)
 FLY E-BIKE WESTCHESTER AVE BRONX3.0 (31 reviews)
 Seattle Trike4.0 (4 reviews)
 Mike's Bikes of Pleasanton4.0 (156 reviews)
 How to Teach Kids to Ride a Bike: A Step-by-Step Guide for Parents
 Tips for Riding on Busy City Streets: Smart Strategies for Urban Cyclists
 Best US National Parks for Mountain Biking: Ride Epic Trails Across America
 Best Aero Helmets for Time Trials and Racing
 How to Clean and Lubricate Your Bike Chain Like a Pro
 10 Must-Have Items for Long-Distance Cycling Trips