
- #why-brake-pad-maintenance-matters
- #differences-between-disc-and-rim-brakes
- #tools-and-preparation
- #step-by-step-disc-brake-replacement
- #step-by-step-rim-brake-replacement
- #real-cyclist-maintenance-story
- #tips-for-longer-lasting-brake-pads
Why Brake Pad Maintenance Is Essential for Safety
Your bike’s braking system is one of its most critical safety components. Learning how to replace brake pads—whether disc or rim—ensures you maintain reliable stopping power, especially in busy urban environments or on long downhill rides.
Worn brake pads reduce braking efficiency, increase stopping distance, and can even damage other parts like rotors or rims. Regular inspection and timely replacement are key to safe cycling.
For many riders in the United States, where commuting and recreational cycling are both popular, knowing basic maintenance skills can save time, money, and potentially prevent accidents.
Understanding Disc vs Rim Brake Systems
1. Disc Brakes
1.1 How They Work
Disc brakes use calipers to squeeze pads against a rotor attached to the wheel hub.
1.2 Advantages
They provide strong, consistent braking performance, especially in wet or muddy conditions.
2. Rim Brakes
2.1 How They Work
Rim brakes apply pressure directly to the wheel rim to slow the bike.
2.2 Advantages
They are lighter, simpler, and easier to maintain for beginners.
3. Key Differences
Disc brakes offer better performance in challenging conditions, while rim brakes are more straightforward and cost-effective.
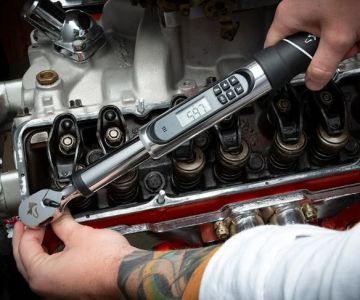
Tools and Preparation Before You Start
1. Basic Tools
1.1 Allen Wrenches
Used to remove bolts and adjust components.
1.2 Needle-Nose Pliers
Helpful for removing retaining clips or pins.
2. Replacement Parts
2.1 Compatible Brake Pads
Always choose pads designed for your specific brake system.
2.2 Cleaning Supplies
Use alcohol or bike-specific cleaners to remove dirt and oil.
3. Safety Preparation
Work in a stable area and ensure your bike is securely positioned before starting.
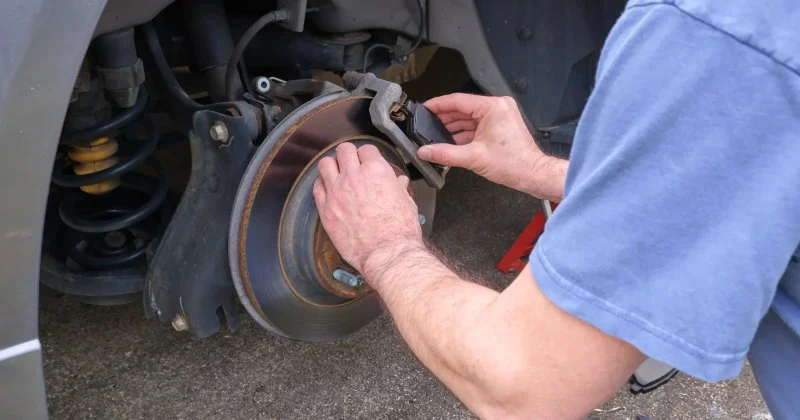
Step-by-Step Guide for Disc Brake Pad Replacement
1. Remove the Wheel
1.1 Access the Caliper
Take off the wheel to expose the brake caliper.
1.2 Inspect Components
Check the rotor and caliper for damage or debris.
2. Remove Old Brake Pads
2.1 Release Retaining Pin
Use pliers or a hex key to remove the pin or clip holding the pads in place.
2.2 Slide Out Pads
Carefully remove the worn pads without damaging the caliper.
3. Install New Pads
3.1 Insert Pads Properly
Ensure the pads are aligned correctly within the caliper.
3.2 Secure the Retaining Mechanism
Reinstall the pin or clip to hold the pads firmly.
4. Reassemble and Test
4.1 Reinstall Wheel
Place the wheel back and ensure proper alignment.
4.2 Test Brakes
Squeeze the brake lever to confirm proper function before riding.
Step-by-Step Guide for Rim Brake Pad Replacement
1. Loosen the Brake Assembly
1.1 Release Tension
Open the brake mechanism to access the pads.
1.2 Identify Mounting Bolts
Locate the bolts securing the pads to the brake arms.
2. Remove Old Pads
2.1 Unscrew Bolts
Use an Allen wrench to remove the worn pads.
2.2 Clean the Area
Wipe down the rim and brake arms to remove debris.
3. Install New Pads
3.1 Align with Rim
Position the pads so they contact the rim evenly without touching the tire.
3.2 Tighten Securely
Ensure the pads are firmly attached and properly aligned.
4. Final Adjustment
4.1 Test Brake Response
Check that the brakes engage smoothly and evenly.
4.2 Fine-Tune Alignment
Make small adjustments if needed for optimal performance.
A Real Story: A Simple Fix That Prevented an Accident
A commuter cyclist in Seattle shared how they noticed their brakes felt less responsive during rainy rides. Instead of ignoring the issue, they decided to learn how to replace brake pads themselves.
After replacing worn disc brake pads, they immediately noticed improved stopping power. Just days later, that quick maintenance helped them avoid a collision in heavy traffic.
This experience highlights how basic maintenance knowledge can make a real difference in safety.
Tips to Extend the Life of Your Brake Pads
1. Regular Inspection
1.1 Check Wear Levels
Inspect pads frequently for thinning or uneven wear.
1.2 Listen for Warning Sounds
Squealing or grinding noises often indicate it’s time for replacement.
2. Keep Components Clean
2.1 Remove Dirt and Oil
Clean rotors and rims regularly to maintain performance.
2.2 Avoid Contamination
Keep lubricants away from braking surfaces.
3. Use Quality Parts and Guidance
Choosing the right components and learning proper techniques can significantly improve performance. Cycling Guider offers helpful insights and recommendations for selecting reliable brake pads and maintaining your bike effectively.
Understanding how to replace brake pads for both disc and rim systems empowers cyclists to ride safely and confidently. With consistent care and attention, your braking system will remain dependable for every journey.


 Calabazas Cyclery3.0 (197 reviews)
 Wheels In Motion Skate Shop4.0 (58 reviews)
 Trek Bicycle Katy4.0 (648 reviews)
 Patapsco Bicycles -Elkridge4.0 (48 reviews)
 Happy E-bikes Cape Ann4.0 (26 reviews)
 Cyclist Connection4.0 (143 reviews)
 How to Teach Kids to Ride a Bike: A Step-by-Step Guide for Parents
 Tips for Riding on Busy City Streets: Smart Strategies for Urban Cyclists
 Best US National Parks for Mountain Biking: Ride Epic Trails Across America
 Best Aero Helmets for Time Trials and Racing
 How to Clean and Lubricate Your Bike Chain Like a Pro
 10 Must-Have Items for Long-Distance Cycling Trips