
How to Inspect a Used Bicycle Before You Buy It
On this page
Quick answer
Before buying a used bicycle, verify the seller and serial number, confirm the frame fits your body and riding, and inspect the frame, fork, wheels, tires, bearings, brakes, steering, drivetrain, and suspension. Test ride only in a safe area with permission. Price necessary service and ask a qualified bike shop to inspect any structural, carbon, hydraulic, or e-bike concern.
Confirm identity and history
Begin with the bicycle’s identity. Ask the seller how long they owned it, why they are selling, where it was purchased, how it was stored, and what repairs or crashes occurred. Request receipts or service records when available, but do not assume missing paperwork means a bad bike.
Locate the serial number, commonly under the bottom bracket or elsewhere on the frame. It should not be ground off, covered, or altered. Compare it with the seller’s documents and check reputable local or national stolen-bike resources. No database check guarantees clear ownership, but a missing or damaged serial number is a reason to stop.
Use a written bill of sale with seller and buyer information, date, price, bicycle description, and serial number, subject to local requirements. Do not buy when the seller cannot reasonably explain ownership or pressures you to avoid verification.
This guide is for U.S. riders evaluating a typical used bicycle. It cannot establish legal ownership or structural safety. Local laws and e-bike classifications vary.
Check fit and intended use
A well-priced bike is not a good purchase if it cannot fit or support your intended riding. Confirm the labeled size, then evaluate standover clearance, saddle-height range, reach to the handlebar, and a comfortable control position.
Size labels are not standardized among brands or model years. A “medium” mountain bike and a “medium” road bike can have very different geometry. Use the manufacturer’s geometry chart for the exact model and year if available.
Check whether the bicycle accepts the tires, racks, fenders, child equipment, or other accessories you need. Verify weight limits and compatibility through manufacturer information. Avoid buying a poor fit with the assumption that a short stem or saddle adjustment will solve every geometry problem.
Inspect the frame and fork
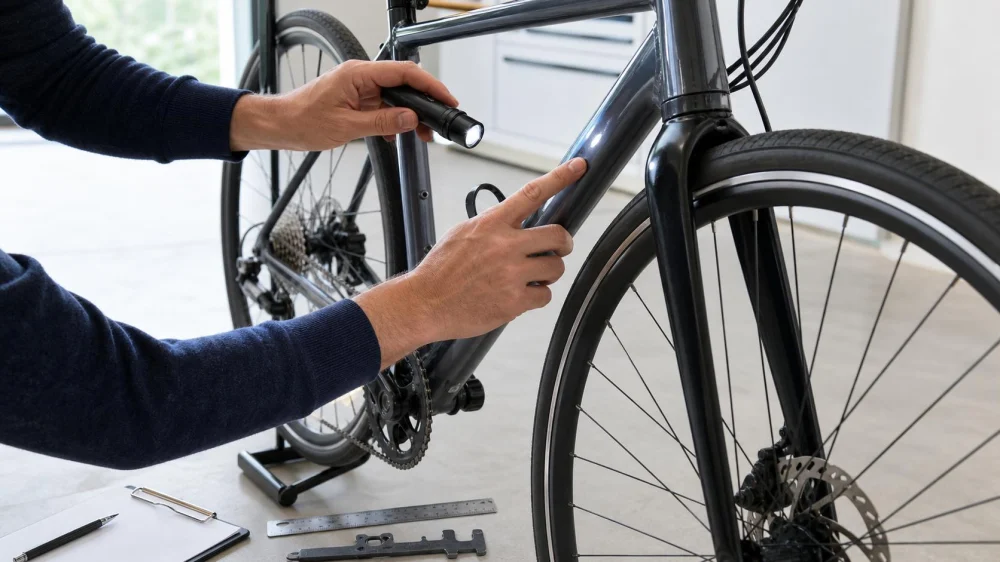
Clean enough dirt to see the structure. In bright light, inspect tubes, joints, welds, fork blades, dropouts, head tube, bottom-bracket area, seat cluster, and points hidden by bags or frame protection.
Look for cracks, dents, buckling, deep gouges, corrosion, paint movement around joints, misalignment, or evidence of impact. Surface scratches can be cosmetic; structural damage is a different decision. Carbon-fiber damage may be difficult to identify visually and requires specialized evaluation.
Stand in front and behind the bike to look for obvious alignment problems, while remembering that visual checks are limited. Check that wheels sit correctly in the frame and fork. Do not test questionable cracks by flexing or striking them.
For suspension, inspect stanchions for scratches or corrosion, seals for leakage, and operation for binding or unusual noise. Rebuild needs can materially change the cost.
Check wheels and tires
Lift each wheel and spin it. Look for side-to-side or up-and-down movement, rim damage, loose or broken spokes, and rubbing. A slightly out-of-true wheel may be serviceable; a cracked rim, damaged carbon, or severe flat spot can require replacement.
Hold the rim and gently check for play at the hub. Roughness, grinding, or movement can indicate bearing adjustment or service needs. Make sure axles and quick releases are correct, secure, and undamaged.
Inspect tire tread, sidewalls, beads, cuts, dry cracking, and age. Check that tire width is compatible with the frame and rim. Tubeless systems may need sealant, tape, valves, or tire replacement even when they still hold air during the viewing.
Test brakes and steering
Before riding, squeeze each brake separately and roll the bike by hand. Levers should not pull to the handlebar, cables or hoses should be secure, and pads should contact the intended braking surface. Inspect rotors or rims for damage and contamination.
Hydraulic fluid leaks, cracked hoses, damaged calipers, deeply worn rims, loose brake mounts, or uncertain stopping power need professional attention before a ride. Disc rotor discoloration or noise alone does not identify the cause.
Hold the front brake and rock the bike gently to check for headset play. Turn the handlebar through its range; steering should move smoothly without binding or a pronounced notch. Confirm the stem and handlebar show no cracks, deep damage, or movement.
Evaluate the drivetrain
Inspect chainrings, chain, cassette or freewheel, crank arms, pedals, and derailleurs. Hooked or sharply worn teeth, a heavily worn chain, bent parts, rust, and seized adjustments can signal replacement needs.
A chain-checking tool can estimate chain wear when used correctly. A new chain on a worn cassette can still skip, so consider the system as a whole. Ask when the chain and gears were replaced.
Shift through all gears on a stand or controlled ride. Listen for persistent skipping, grinding, or delayed shifts. Cable adjustment may be simple, but a bent derailleur hanger, worn drivetrain, damaged shifter, or incompatible parts can cost more.
Check crank and pedal bearings for play or roughness. Confirm the seatpost moves and has not seized in the frame; do not force it.
Take a controlled test ride
Test ride only with the seller’s permission, appropriate helmet, working brakes, and a safe traffic-free area. Leave identification or another arrangement that protects both parties without surrendering sensitive documents.
Start slowly. Test each brake, straight-line tracking, steering, shifting, pedaling under moderate load, and standing briefly if appropriate. Listen for clicks or creaks, but remember that sound location can be misleading.
Stop immediately for brake failure, steering movement, wheel instability, frame concern, severe drivetrain skipping, or another unsafe symptom. Do not use a road test to “see if” visibly damaged critical parts hold.
For an e-bike, also verify the correct charger, battery condition information, assist modes, display, keys, firmware or account transfer, and manufacturer support. Battery health and fire risk require model-specific professional assessment.
Estimate next costs and decide
List immediate safety work, near-term maintenance, fit changes, and optional upgrades. Obtain realistic parts and labor estimates from a bike shop. Include tires, tubes or sealant, chain, cassette, brake pads, cables, bearings, suspension service, and e-bike battery or charger concerns as applicable.
Use this decision rule: buy only when ownership is reasonably documented, fit is workable, structural and safety questions are resolved, and purchase price plus necessary work still makes sense compared with alternatives.
Walk away from altered identification, seller pressure, unexplained structural damage, a frame that does not fit, unsafe test conditions, or costs you cannot evaluate. Scarcity is not a reason to skip safety.
Sources and evidence notes
This guide reflects common bicycle pre-purchase practice: verify identity, match fit and purpose, inspect structural and safety systems, test in a controlled setting, and price deferred maintenance.
Visual checks cannot certify a frame, fork, wheel, brake, suspension, or battery. Use manufacturer information, recognized stolen-bike resources, local law, and a qualified bicycle mechanic for a specific purchase.
Frequently asked questions
Should I buy a bike with no service records?
Possibly, if ownership, condition, fit, and price check out. Assume unverified maintenance may still be due and budget for inspection.
Can scratches on carbon fiber be cosmetic?
Yes, but visual appearance may not reveal deeper damage. Seek a qualified carbon inspection when damage location or history raises concern.
How long should a test ride be?
Long enough to test controls, gears, fit, and basic handling in a safe area, as agreed with the seller. It is not a substitute for inspection.
Is a cheap bike with worn parts a good deal?
Only after adding realistic service and replacement costs. A drivetrain, wheel, suspension, or battery can exceed the apparent savings.
Should I take the bike to a shop before buying?
For a high-cost, complex, carbon, suspension, hydraulic, cargo, or e-bike purchase, a professional pre-purchase check is especially useful.
Conclusion and next steps
Ask for the serial number and exact model before meeting. Bring a light, basic measuring tool, helmet, and checklist. At the viewing, confirm ownership and fit before evaluating components. If a structural or safety question remains, pause the sale and arrange a bike-shop inspection. The right used bicycle is one you can identify, fit, service, and ride safely—not simply the lowest price.






 Bosco Bike Fits4.0 (24 reviews)
 Bike World USA1.0 (30 reviews)
 Palo Alto Bicycles4.0 (384 reviews)
 The Bikery at The Brewery4.0 (145 reviews)
 Union Cycle Center4.0 (120 reviews)
 Cycle Quest4.0 (88 reviews)
 How to Teach Kids to Ride a Bike: A Step-by-Step Guide for Parents
 Tips for Riding on Busy City Streets: Smart Strategies for Urban Cyclists
 Best US National Parks for Mountain Biking: Ride Epic Trails Across America
 Best Aero Helmets for Time Trials and Racing
 How to Clean and Lubricate Your Bike Chain Like a Pro
 10 Must-Have Items for Long-Distance Cycling Trips