
- 1-Choosing-the-Right-Camera-for-Cycling-Photography
- 2-Mastering-Angles-and-Composition-on-the-Road-or-Trail
- 3-Using-Natural-Light-for-Dynamic-Cycling-Shots
- 4-Capturing-Speed-and-Emotion-in-Action-Shots
- 5-Editing-and-Sharing-Your-Cycling-Photography
1. Choosing the Right Camera for Cycling Photography
If you’ve ever tried photographing a fast-moving cyclist, you know it’s not as simple as pointing and shooting. Learning how to capture great cycling photos: camera, angles, and lighting starts with selecting equipment that fits your goals and environment.
For many U.S. riders and enthusiasts, a high-quality smartphone is more than capable of producing impressive cycling photos. Modern phones feature fast shutter speeds and computational photography that can handle action surprisingly well. However, if you want sharper detail and more creative control, a mirrorless or DSLR camera with a fast lens (such as a 50mm or 70-200mm) can dramatically improve results.
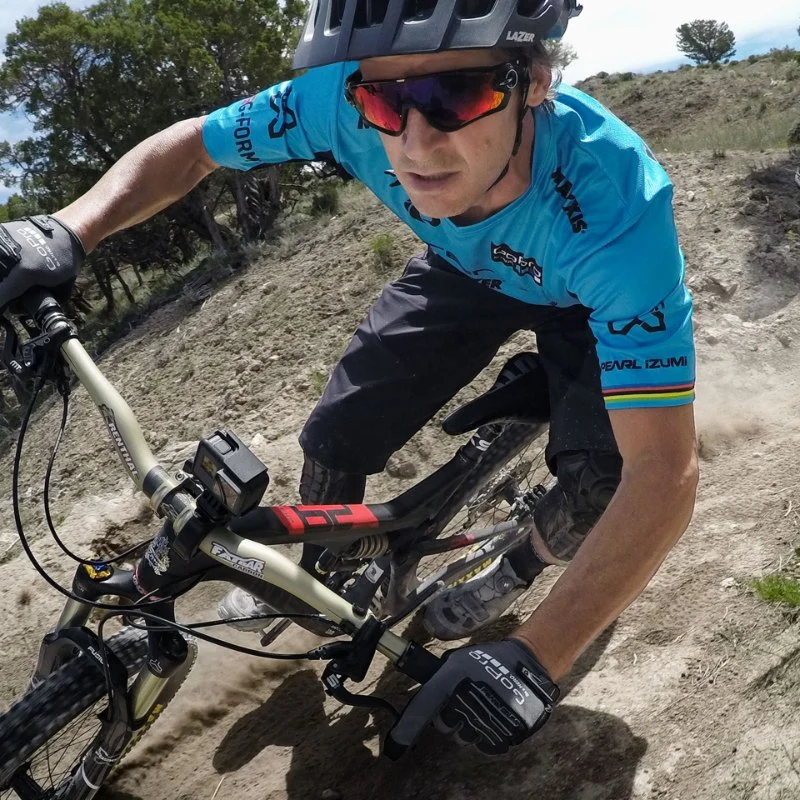
Action cameras mounted on handlebars or helmets also offer unique perspectives. These are particularly popular among mountain bikers in states like Colorado and Utah, where capturing rugged terrain adds storytelling depth.
2. Mastering Angles and Composition on the Road or Trail
Great cycling photography isn’t just about the rider—it’s about perspective. Thoughtful composition separates ordinary snapshots from memorable images.
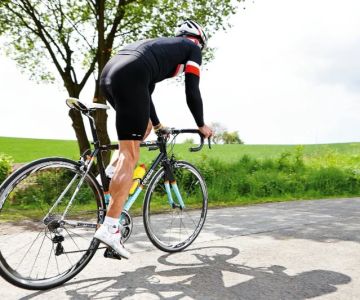
2.1 Shoot from Low Angles
Getting low to the ground emphasizes speed and power. A low shooting angle makes the rider appear more dynamic and dramatic, especially when climbing hills or sprinting on flat pavement.
2.2 Use Leading Lines
Road markings, gravel paths, or trail curves naturally guide the viewer’s eye. Position the rider within these lines to create depth and movement in the frame.
2.3 Frame the Environment
Cycling often takes place in stunning locations—from California coastal highways to Vermont’s fall foliage. Incorporating scenic backdrops enhances storytelling and connects the rider to the landscape.
A photographer in Oregon once shared how repositioning just a few feet lower transformed his image from a flat side shot to a dramatic perspective that highlighted both the rider and the winding forest trail behind them.
3. Using Natural Light for Dynamic Cycling Shots
Lighting plays a critical role in how to capture great cycling photos: camera, angles, and lighting all work together to shape mood and clarity.
3.1 Golden Hour Advantage
Early morning and late afternoon light provide soft, warm tones that reduce harsh shadows. This “golden hour” lighting is especially flattering for outdoor sports photography.
3.2 Backlighting for Drama
Shooting with the sun behind the rider can create silhouettes or glowing rim light effects. This technique adds depth and intensity, particularly during sunset rides.
3.3 Avoid Midday Harsh Light
Direct midday sun can create strong shadows and overexposed highlights. If shooting during this time, position riders in partial shade or adjust camera settings to balance exposure.
4. Capturing Speed and Emotion in Action Shots
One of the most exciting aspects of cycling photography is conveying motion.
4.1 Use Fast Shutter Speeds
To freeze motion, set your shutter speed high enough to capture crisp detail. This works well for sprint finishes or technical trail sections.
4.2 Experiment with Panning
Panning involves following the cyclist with your camera while using a slightly slower shutter speed. The rider remains sharp while the background blurs, creating a dramatic sense of speed.
4.3 Focus on Emotion
Beyond technique, authentic expressions elevate photos. Capture moments of determination during climbs or joy at the finish line. These genuine emotions connect viewers to the story.
During a local criterium race in Chicago, one amateur photographer captured a rider’s exhausted yet triumphant expression just as he crossed the line. That single image quickly circulated through social media cycling groups because it conveyed both effort and victory.
5. Editing and Sharing Your Cycling Photography
Post-processing enhances your work without overdoing it.
5.1 Adjust Exposure and Contrast
Fine-tuning brightness and contrast can make colors pop and details stand out. Keep edits natural to preserve authenticity.
5.2 Enhance Colors Thoughtfully
Boosting saturation slightly can highlight vibrant cycling jerseys and scenic backdrops, but avoid unrealistic tones.
5.3 Share Strategically
Sharing on social media platforms and cycling communities allows your work to inspire others. For riders seeking additional photography inspiration and cycling resources, platforms like Cycling Guider offer helpful insights tailored to enthusiasts.
Mastering how to capture great cycling photos: camera, angles, and lighting requires practice and creativity. By combining proper equipment, dynamic angles, and thoughtful lighting techniques, you can create powerful images that celebrate both the sport and the adventure behind every ride.


 Fat Rick's Bicycle Emporium4.0 (42 reviews)
 Pedego Electric Bikes Germantown-Memphis5.0 (32 reviews)
 Wyckoff Cycle llc4.0 (70 reviews)
 Stellar Sports4.0 (20 reviews)
 Burbank Bike Shop4.0 (117 reviews)
 Gulf Coast E-Bikes2.0 (13 reviews)
 How to Teach Kids to Ride a Bike: A Step-by-Step Guide for Parents
 Tips for Riding on Busy City Streets: Smart Strategies for Urban Cyclists
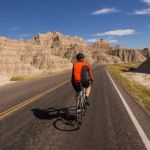 Best US National Parks for Mountain Biking: Ride Epic Trails Across America
 Best Aero Helmets for Time Trials and Racing
 How to Clean and Lubricate Your Bike Chain Like a Pro
 10 Must-Have Items for Long-Distance Cycling Trips