

- 1- Why You Need a Bike Repair Kit for Long Tours
- 2- Essential Items for Your Bike Repair Kit
- 3- How to Package and Store Your Repair Kit
- 4- Pro Tips for Bike Maintenance on the Go
1- Why You Need a Bike Repair Kit for Long Tours
When embarking on long cycling tours, especially those that take you into remote areas, a bike repair kit becomes an essential part of your gear. The chances of encountering mechanical issues like a flat tire, broken chain, or loose screws are high. Carrying a well-equipped repair kit ensures you can address these problems on the go, avoiding delays and minimizing risks to your safety.
Even the most experienced cyclists face unexpected breakdowns during their tours. Having a repair kit allows you to remain self-sufficient and confident that you can tackle minor mechanical issues, keeping your ride uninterrupted. This kit should contain basic tools and spare parts, tailored to the specific needs of your bike and the type of terrain you will encounter.
2- Essential Items for Your Bike Repair Kit
Building an effective bike repair kit starts with understanding the most common issues cyclists face during long tours. Below is a list of essential items you should include in your repair kit:
- Multi-tool: A multi-tool is compact and includes a variety of essential tools like a chain breaker, screwdrivers, and wrenches.
- Spare tubes: Carry at least two spare inner tubes, as punctures are among the most common cycling problems. Be sure they’re compatible with your bike’s tire size.
- Tire levers: These are used to remove the tire from the rim when repairing a puncture. They’re small, lightweight, and easy to store.
- Patch kit: A patch kit is an additional backup for repairing a flat tire. If you run out of spare tubes, you can patch up a punctured tube temporarily.
- Chain links and chain oil: A spare chain link and chain oil will help if your chain snaps or becomes too dry, especially during long tours.
- Brake and derailleur cables: These cables are prone to wear and tear. Having spare cables can save you if one breaks during your ride.
- Bike pump: A portable bike pump is crucial for inflating your tires to the proper pressure on the go. Consider getting a mini-pump or CO2 inflator.
- First aid kit: It’s always wise to include a basic first aid kit with bandages, antiseptic wipes, and other essentials for handling minor injuries on the road.
Having these essentials will make sure you're well-prepared to handle most common bike issues during long tours. You can also adjust the kit based on the specific needs of your bike (e.g., disc brakes, different tire sizes) and the duration or remoteness of your tour.
3- How to Package and Store Your Repair Kit
When packing your bike repair kit, it’s important to keep everything organized and easy to access. A small, durable bag or tool roll works well for storing your repair kit. You should also make sure the items are protected from the elements, such as rain or dirt. Here are some storage tips:
- Keep the kit compact: Choose a small, waterproof bag that can be mounted on your bike or easily carried in your backpack.
- Group similar items: Group tools and parts based on their function. For example, keep tire repair items together and tools in one compartment.
- Use zip-lock bags: Place smaller items like patches, screws, and small tools in clear zip-lock bags to prevent them from getting lost and to keep them dry.
- Accessibility: Store the kit in a location that is easily accessible while riding. A saddlebag or under-the-seat pouch works great for this purpose.
Being able to quickly access the tools you need will save you time and effort during a repair, so choose a storage option that makes sense for you and your bike.
4- Pro Tips for Bike Maintenance on the Go
Once you’ve built your bike repair kit and packed it properly, it’s time to consider some pro tips for maintaining your bike during long tours:
- Regularly check your bike: Before heading out, inspect your bike for any issues. Make sure the tires are properly inflated, the chain is lubricated, and the brakes are functioning well.
- Maintain your bike during the ride: After long rides, check your bike’s components to ensure they’re still in good condition. Tighten bolts, lubricate the chain, and clean the frame to keep your bike performing at its best.
- Learn basic bike repairs: Knowing how to fix a flat tire, adjust the brakes, or repair a chain will make your tour much more enjoyable. Take time to practice these skills before embarking on a long tour.
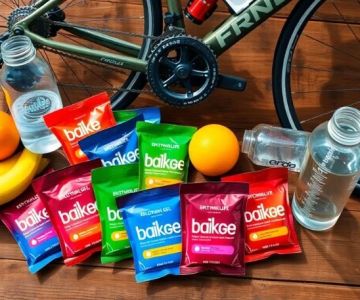
- Stay hydrated and fueled: Long tours require stamina. Ensure that you hydrate regularly and eat the right foods to keep your energy up.
By following these tips and keeping your repair kit stocked and organized, you can enjoy your cycling tour with confidence, knowing you're prepared for the unexpected.
For more cycling tips and to find the best tools and accessories for your bike, visit Cycling Guider today!


 3rd Coast Cycles4.0 (93 reviews)
 Biker Bar4.0 (57 reviews)
 Rod's Reride Bikes5.0 (8 reviews)
 Foy's Bike Shop4.0 (65 reviews)
 Catskill Bicycle Supply Co.4.0 (51 reviews)
 P & T Fitness-Pedal & Tour4.0 (45 reviews)
 How to Teach Kids to Ride a Bike: A Step-by-Step Guide for Parents
 Tips for Riding on Busy City Streets: Smart Strategies for Urban Cyclists
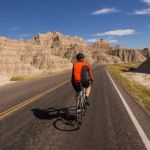 Best US National Parks for Mountain Biking: Ride Epic Trails Across America
 Best Aero Helmets for Time Trials and Racing
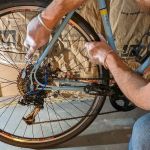 How to Clean and Lubricate Your Bike Chain Like a Pro
 10 Must-Have Items for Long-Distance Cycling Trips