
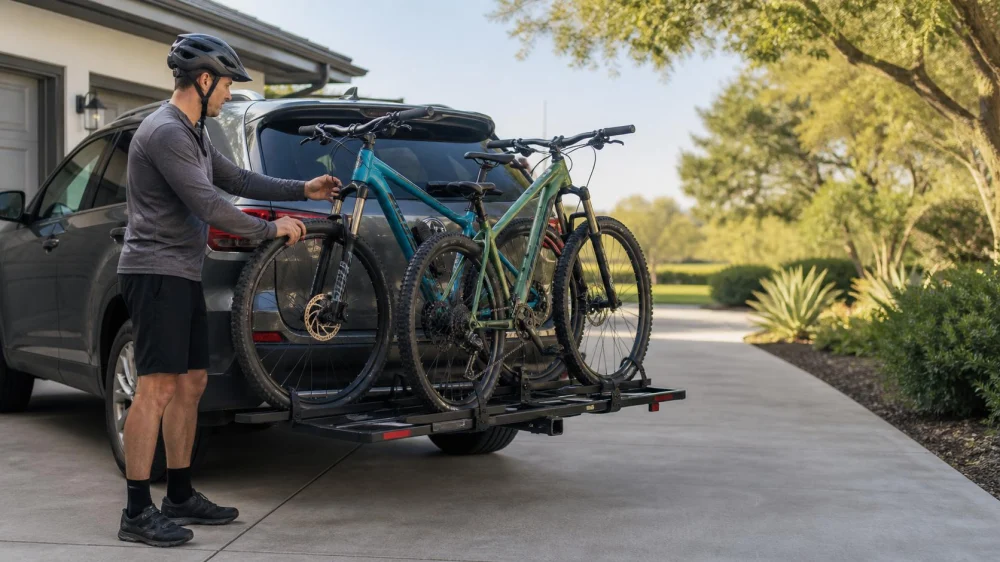
Bike Rack Pre-Drive Check: Secure Every Contact Point
On this page
- Quick answer
- Match the rack, vehicle, and bicycle
- Check the rack installation
- Load the bicycle correctly
- Check visibility and clearance
- A practical pre-drive checklist
- Recheck during the trip
- E-bikes and unusual frames
- Limitations and important notes
- Sources and evidence notes
- Frequently asked questions
- Conclusion and next steps
Quick answer
Before driving with a bicycle rack, confirm that the rack fits the exact vehicle and bike, stays within every weight and load limit, and is fully attached at its designed points. Secure the frame or wheels as the manufacturer directs, add no improvised load path, check that lights and the license plate remain visible as required, and shake-test the complete setup. Stop soon after departure to recheck it.
This guide is for U.S. drivers using roof, hitch, trunk, or tailgate bicycle carriers. Rack designs and state rules vary. Follow the vehicle, hitch, rack, adapter, and bicycle manufacturers’ current instructions.
Match the rack, vehicle, and bicycle
A safe setup begins before installation. Confirm the rack is approved for the vehicle body, roof system, hitch class and receiver size, spare-tire configuration, or truck tailgate as applicable. Do not assume a rack that attaches physically is compatible.
Check the lowest applicable weight limit in the complete system: vehicle roof or tongue load, hitch or crossbar, rack, tray or arm, adapter, and each bike position. Include the weight of the rack, bicycles, batteries left installed, and accessories when the instructions require it.
Confirm frame, wheelbase, tire width, fender, axle, brake, and carbon-frame compatibility. Some clamp styles are not appropriate for certain frame shapes or materials. Use only approved adapters.
Check the rack installation
Install on a clean, undamaged mounting surface. Follow the specified orientation, tightening sequence, torque, pin placement, strap path, and lock position. A lock deters theft but does not automatically prove structural attachment.
- Hitch racks need the correct pin, anti-rattle device, receiver engagement, and tilt or swing mechanism locked for travel.
- Roof racks need compatible towers, crossbars, attachment points, and spacing.
- Trunk racks need correct hook positions, strap routes, pad contact, and spoiler compatibility.
- Tailgate systems need safe pad placement and secure bicycle separation without interfering with cameras, latches, or lights.
Do not attach to plastic trim, glass, spoilers, damaged bodywork, or another point unless the rack instructions explicitly designate it.
Load the bicycle correctly
Remove loose bottles, pumps, bags, computers, lights, child seats, and accessories that could detach or catch wind. Close and secure storage compartments. For an e-bike, follow battery removal and transport guidance from the manufacturers.
Place each bicycle in the assigned direction and position. Secure the primary retention point first, then every wheel strap, frame contact, or secondary stabilizer. Straps should be flat, correctly routed, and clear of sharp edges, brakes, spokes, and hot exhaust.
Prevent bike-to-bike and bike-to-vehicle contact. Padding can protect finishes, but it must not replace a required clamp or create a slippery attachment. Spin wheels gently and move handlebars or pedals to confirm nothing strikes the vehicle or another bicycle.
Check visibility and clearance
Stand behind and beside the loaded vehicle. Confirm required lamps, reflectors, signals, license plate, mirrors, cameras, sensors, and exhaust outlets are not blocked or exposed to damage. Supplemental light and plate systems may be required or appropriate; follow current law and approved equipment.
Roof racks change total height. Measure the loaded height and keep a visible reminder inside the parked vehicle. Avoid garages, drive-thrus, low branches, car washes, ferry decks, and other low clearances until verified.
Hitch and rear carriers increase length and can reduce departure angle. Allow extra room when reversing, turning, crossing steep driveways, and parking. Cameras and sensors may not represent the rack’s full outline.
A practical pre-drive checklist
- Confirm compatibility and limits. Check manuals for the complete system and bicycle.
- Lock every travel mechanism. Verify pins, levers, hinges, tilt features, towers, and straps.
- Secure every bike. Check all trays, arms, clamps, and wheel retention points.
- Remove loose items. Take off anything not designed to remain during vehicle transport.
- Inspect contact areas. Make sure no cable, brake hose, spoke, frame finish, or vehicle panel is pinched or rubbing.
- Check lights and plate. Verify legal visibility and operation from behind.
- Perform a shake test. Push and pull the rack and each bicycle firmly by hand. Movement should match the system’s normal design, not reveal looseness.
- Record clearance. Know the vehicle’s new height, length, and rear clearance.
Recheck during the trip
Drive smoothly and follow the rack maker’s speed, road, and weather limits. Avoid abrupt maneuvers and rough routes beyond the equipment rating. Listen for new movement or noise, but do not turn around or inspect while driving.
Stop in a safe place shortly after departure and after rough roads, strong weather, or a long interval. Check attachment points, straps, clamps, wheel positions, locks, and contact marks. Retighten only as the instructions permit; excessive tightening can damage equipment or a frame.
If a rack or bicycle shifts, a strap frays, a component contacts a wheel, or attachment becomes uncertain, stop driving. Unload or repair the system safely before continuing.
E-bikes and unusual frames
E-bikes can be substantially heavier than conventional bicycles. Verify per-bike and total ratings, lift technique, ramp compatibility, battery handling, and clamp location. Never exceed a limit by removing only part of the bike unless the remaining load is documented as acceptable.
Carbon frames, step-through frames, fat tires, long wheelbases, full fenders, cargo bikes, recumbents, adaptive cycles, and bicycles with suspension may need a specific carrier or adapter. Contact the rack and bicycle manufacturers when instructions do not clearly cover the combination.
Limitations and important notes
- Do not use bungee cords or a cable lock as the primary structural retention.
- Do not exceed weight, speed, road-surface, spacing, or vehicle-fit limits.
- Keep straps and bicycle parts away from exhaust heat and moving vehicle components.
- Remove the rack before an automatic car wash unless every manufacturer explicitly permits it.
- Local requirements for plates, lights, flags, and load projection differ; verify the route’s current rules.
Sources and evidence notes
This article reflects general load-securement and rack-manufacturer practice: verify compatibility, stay within the lowest system limit, use every designed retention point, check visibility and clearance, and recheck after loading and during travel.
Use current vehicle, hitch, rack, adapter, and bicycle documentation plus applicable transportation rules. No rack-bike combination or legal compliance is certified here.
Frequently asked questions
Do rack locks secure the bike for driving?
Locks mainly address theft. Use every required structural arm, strap, clamp, pin, and tray feature regardless of the lock.
Can I add a bungee cord for extra security?
Only as a non-structural organizer if the manufacturer permits it. A bungee must never replace a required retention point and must stay clear of wheels and exhaust.
Should I remove an e-bike battery?
Follow the e-bike and rack instructions. If removal is required or recommended, protect and transport the battery exactly as its manufacturer directs.
How often should I recheck the rack?
Check before every drive, soon after departure, and after conditions that could loosen or shift the load. Follow any more specific manufacturer interval.
Can I rely on the backup camera?
No. The rack changes the vehicle outline and may block or confuse cameras and sensors. Use direct checks and a spotter when appropriate.
Conclusion and next steps
Treat the carrier, vehicle, and bicycle as one load system. Verify fit and the lowest weight limit, install every pin and strap correctly, secure each bike, remove loose items, and check lights and clearance. Shake-test before departure and stop soon to inspect again. Any unexplained shift means stop and correct the setup before driving farther.






 CyberCycleCoach5.0 (95 reviews)
 The Avenue Bicycle Station4.0 (64 reviews)
 Bikes Plus Jensen Beach MOVED TO 879 NE Jensen Beach Blvd4.0 (28 reviews)
 Wana Ride Bike Shop5.0 (1 reviews)
 Electrified E-Bikes4.0 (199 reviews)
 Bikealot4.0 (93 reviews)
 How to Teach Kids to Ride a Bike: A Step-by-Step Guide for Parents
 Tips for Riding on Busy City Streets: Smart Strategies for Urban Cyclists
 Best US National Parks for Mountain Biking: Ride Epic Trails Across America
 Best Aero Helmets for Time Trials and Racing
 How to Clean and Lubricate Your Bike Chain Like a Pro
 10 Must-Have Items for Long-Distance Cycling Trips