
Bike Chain Wear: Measure Before It Damages Gears
On this page
Quick answer
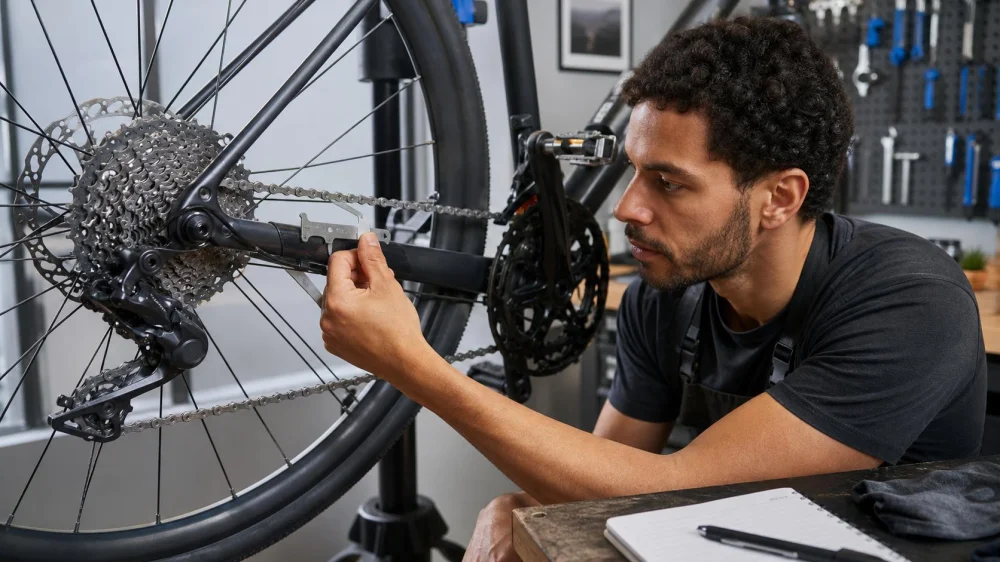
Measure bicycle chain wear with a compatible chain checker or the method specified by the drivetrain manufacturer. Check several sections on a clean chain, follow the tool’s directions, and compare the reading with the replacement limit for your chain and gear count. Replacing a worn chain on time can reduce accelerated wear on chainrings and cassette sprockets.
What chain wear means
A bicycle chain does not usually “stretch” because its side plates become longer. Wear at pins, rollers, and bearing surfaces increases the distance measured across multiple links. The worn chain then meshes less accurately with the teeth.
Mileage alone cannot predict the result. Dirt, lubrication, rider power, shifting, weather, chainline, and maintenance all affect wear.
Symptoms are not enough
Noise, rough pedaling, slow shifts, skipping under load, or visible rust may justify inspection, but they do not measure chain wear. The same symptoms can come from adjustment, damaged teeth, stiff links, contamination, or incompatible parts.
A chain can exceed its recommended wear limit before it skips. Measure rather than waiting for ride quality to deteriorate.
Measure with the right tool
- Identify the chain model, number of rear sprockets, and drivetrain instructions.
- Clean enough dirt from the chain for the gauge to seat correctly.
- Place the bike securely with the drivetrain stationary.
- Use the checker exactly as its maker specifies; some tools measure roller movement differently.
- Test several chain sections and avoid relying on one unusual link.
- Record the date and result.
Do not force a gauge into place. A ruler method can work when performed correctly across enough links, but small reading errors matter; a purpose-built compatible checker is usually easier to repeat.
Interpret the result
Replacement limits vary with drivetrain design and manufacturer. Tightly spaced modern systems may use a different limit from wider older drivetrains, single-speed bikes, or e-bikes.
Use the most specific source available: chain manufacturer, drivetrain maker, and checker instructions. When sources appear to conflict, ask a qualified bike shop which limit applies to the exact combination.
If readings vary greatly around the chain, inspect for stiff, damaged, or incorrectly joined links. Do not average away a localized defect.
Replace without creating new problems
A replacement chain must match the drivetrain and be sized correctly. Follow instructions for direction, quick link or joining pin, routing through the derailleur, and single-use connection parts.
A new chain that skips on selected sprockets can reveal existing cassette wear or another setup problem. Stop applying heavy load and have the drivetrain assessed rather than assuming the new chain needs to “wear in.”
Build a measurement routine
Check more often during wet, dusty, high-mileage, high-power, off-road, or e-bike use. Measure after cleaning and before a long trip. Tracking results helps you choose an interval based on your riding rather than a universal mileage claim.
Lubricate according to product and chain instructions, wipe excess from the outside, and avoid spraying lubricant onto brake rotors or rims.
Chain-wear checklist
- Identify chain and drivetrain
- Use a compatible checker
- Clean before measuring
- Test several sections
- Use the correct replacement limit
- Inspect stiff or damaged links
- Match and size the replacement chain
- Investigate skipping with a new chain
Limitations and important notes
A chain checker does not assess every drivetrain fault. Cracked links, damaged teeth, loose components, and shifting problems need separate inspection.
Stop riding if a chain is cracked, partly separated, severely corroded, or repeatedly derails. A broken chain under load can cause loss of control.
Sources and evidence notes
The authoritative sources for a specific bicycle are the chain and drivetrain manufacturer’s current service instructions and the gauge maker’s measurement method. Thresholds are intentionally not generalized here because compatibility and measurement design vary.
Frequently asked questions
Can I measure a dirty chain?
Heavy contamination can prevent consistent tool seating. Clean the chain as the tool instructions require first.
Does a noisy chain mean it is worn out?
Not necessarily. Measure wear and inspect lubrication, adjustment, damage, and compatibility.
Why does a new chain skip?
Existing sprocket wear, chain sizing, routing, adjustment, or incompatibility may be involved. Have the system checked before hard riding.
Should I replace the cassette with every chain?
No universal rule applies. Replace components based on condition, compatibility, and manufacturer or qualified shop guidance.
Conclusion and next steps
Identify the drivetrain, choose a compatible gauge, and measure several chain sections today. Record the result and recheck at an interval shaped by your actual riding conditions.






 Xtreme Wheels Bike and Sport4.0 (239 reviews)
 Olde Towne Bicycles, Inc. - Fredericksburg4.0 (100 reviews)
 The Bike House4.0 (44 reviews)
 ERIK'S - Bike Board Ski4.0 (374 reviews)
 ERIK'S - Bike Board Ski4.0 (392 reviews)
 Fly E-Bike DC4.0 (47 reviews)
 How to Teach Kids to Ride a Bike: A Step-by-Step Guide for Parents
 Tips for Riding on Busy City Streets: Smart Strategies for Urban Cyclists
 Best US National Parks for Mountain Biking: Ride Epic Trails Across America
 Best Aero Helmets for Time Trials and Racing
 How to Clean and Lubricate Your Bike Chain Like a Pro
 10 Must-Have Items for Long-Distance Cycling Trips