
1. Understanding Roof Racks for Bikes
Roof racks are one of the most popular and efficient ways to transport your bike. They allow you to save space inside your car while providing a secure and stable method for traveling long distances. However, mounting a bike on a roof rack can be tricky, especially if you want to avoid scratching your vehicle’s roof or damaging the bike itself.
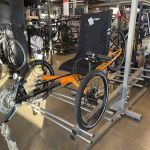
Before you start mounting your bike, it’s essential to understand the different types of roof racks available, including those that hold the bike by the frame or the wheels. Each design has its advantages, and the choice depends on your specific needs, such as bike type and car roof configuration.
2. Preparing Your Bike and Vehicle for Transport
Proper preparation is key to safely mounting a bike on a roof rack without causing scratches. Here’s how you can get ready:
2.1 Clean Both the Vehicle and the Bike
Before you start mounting your bike, make sure both the vehicle and the bike are clean. Dirt, gravel, or debris on the vehicle's roof or the bike can cause scratches during the mounting process. Take a few minutes to wash the bike and the area of the car where it will be mounted.
2.2 Gather the Right Tools
Having the right tools and accessories is crucial for safe bike mounting. If your roof rack requires an adapter or special straps, make sure you have them on hand. You may also want to use a bike pad or towel to protect the bike’s frame and your car’s roof.
2.3 Adjust the Bike Before Mounting
Adjust your bike's components before mounting it onto the roof rack. Lower the seat, remove the front wheel if possible, and turn the handlebars to prevent any part of the bike from sticking out too much and causing issues when lifting it onto the roof rack.
3. Step-by-Step Guide to Mounting a Bike on a Roof Rack
Here’s a simple, step-by-step guide to help you mount your bike on a roof rack without scratching your vehicle:
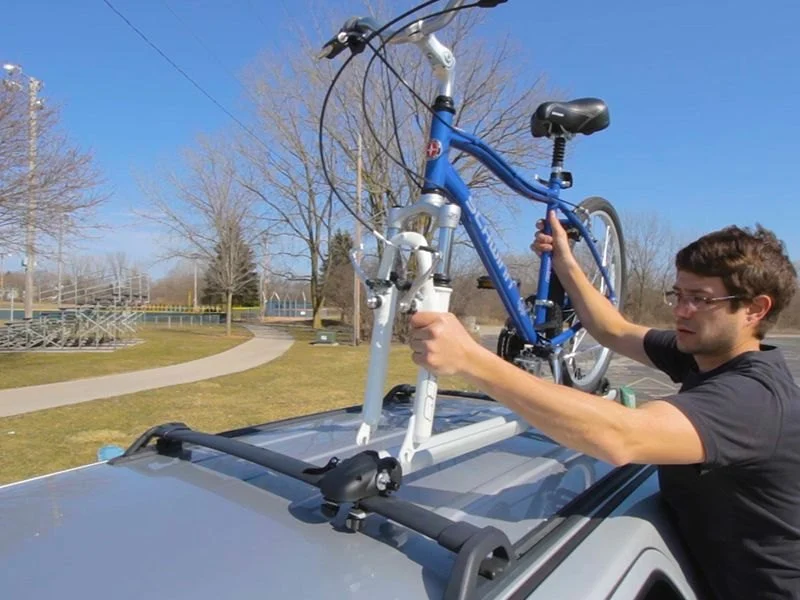
3.1 Position the Bike and Align with the Rack
Start by positioning the bike next to the roof rack. Make sure the bike is properly aligned with the rack’s mounts. If you have a frame-mounted rack, lift the bike by the frame, ensuring that it does not touch the roof of the car. For wheel-mounted racks, place the wheels in the designated holders first.
3.2 Secure the Bike to the Rack
Once the bike is aligned, carefully secure it to the roof rack using the provided straps or clamps. For frame-mounted racks, tighten the frame mount securely but gently to avoid over-tightening and damaging the bike. For wheel-mounted racks, make sure the wheels are tightly secured and the bike is stable on the rack.
3.3 Double-Check Everything
Before hitting the road, double-check that the bike is securely fastened and that the roof rack is properly locked. Ensure that no part of the bike is hanging off the sides or could shift during driving, as this could cause unnecessary friction against the car’s roof.
4. Additional Tips to Prevent Scratches and Damage
In addition to the basic steps, here are some additional tips to help prevent scratches and damage to your vehicle and bike during transport:
4.1 Use Protective Padding
Consider using a protective cover or padding on the roof rack where the bike contacts the vehicle. A bike pad or towel wrapped around the bike frame can prevent scratches caused by friction. Many roof rack manufacturers offer soft pads that you can attach to the rack’s frame to further protect your car’s roof.
4.2 Invest in Quality Straps
Quality, durable straps will help secure the bike tightly without causing any damage. Make sure the straps are cushioned and won’t dig into the bike’s frame. Avoid using thin or cheap straps that can slip or wear out over time.
4.3 Avoid Overloading the Roof Rack
Don’t overload your roof rack with too many bikes, as this can cause additional stress on both the rack and the vehicle’s roof. Check the weight limit of your roof rack and ensure it is capable of handling the weight of your bike safely.
5. Real-Life Example: How Proper Mounting Prevented Scratches
One of our customers, John, had been transporting his bike using a roof rack for several months. After realizing his previous mounting method was causing minor scratches on the car’s roof, he switched to a new frame-mounted roof rack with soft, cushioned padding. Not only did this prevent any further scratches, but it also made mounting the bike much easier and quicker. This real-life example emphasizes the importance of using the right tools and techniques for safe bike transport.
6. Why Choose Cycling Guider for Your Bike Transport Needs
If you're looking for expert recommendations on roof racks and other bike transport solutions, look no further than Cycling Guider. We offer a wide selection of high-quality roof racks, accessories, and protective gear to ensure your bike is transported safely and securely. Visit our website today to explore our products and find the best solutions for your bike transport needs!


 Gray Goat - South4.0 (432 reviews)
 D & D rides0.0 (0 reviews)
 Bikes Plus Jensen Beach MOVED TO 879 NE Jensen Beach Blvd4.0 (28 reviews)
 Bicycle Centres of Everett Ski and Snowboard4.0 (675 reviews)
 Atlanta Cycling - Ansley4.0 (996 reviews)
 Bicycle World Lake Worth3.0 (177 reviews)
 How to Teach Kids to Ride a Bike: A Step-by-Step Guide for Parents
 Tips for Riding on Busy City Streets: Smart Strategies for Urban Cyclists
 Best US National Parks for Mountain Biking: Ride Epic Trails Across America
 Best Aero Helmets for Time Trials and Racing
 How to Clean and Lubricate Your Bike Chain Like a Pro
 10 Must-Have Items for Long-Distance Cycling Trips