
- 1. The Importance of Tubeless Tires in Cycling
- 2. Must-Have Tools for Setting Up Tubeless Tires
- 3. Step-by-Step Guide to Setting Up and Adjusting Tubeless Tires
- 4. Maintaining Your Tubeless Tires: Tools You Need
- 5. Tips and Tricks for a Perfect Tubeless Setup
1. The Importance of Tubeless Tires in Cycling
In recent years, tubeless tires have revolutionized the cycling world. These tires, which do not require an inner tube, offer numerous advantages over traditional tires. They reduce the risk of flats, provide better grip, and allow for lower air pressure, resulting in a smoother and more efficient ride. However, to fully take advantage of these benefits, it’s crucial to have the right tools for setting up and adjusting tubeless tires.
Setting up tubeless tires correctly can make a big difference in performance and safety. In this article, we’ll discuss the best tools to make the process easier, as well as how to properly set up and maintain your tubeless tires for the best results. By using the right equipment, you can ensure that your tires are properly sealed and perform at their peak on every ride.
2. Must-Have Tools for Setting Up Tubeless Tires
Setting up tubeless tires requires precision, and having the right tools can make all the difference. Here are some essential tools you’ll need to successfully install and adjust tubeless tires:
2.1 Tubeless Tire Valve
A high-quality tubeless tire valve is a must-have. These valves help create a tight seal between the tire and the rim, preventing air from escaping. Make sure to choose a valve that fits your specific rim type, whether it’s Presta or Schrader. A valve with a removable core is highly recommended for easier sealant insertion.
2.2 Tire Sealant
To ensure your tubeless tires maintain their air pressure and perform well, you’ll need a good tire sealant. The sealant works by filling small punctures and preventing leaks. Popular brands like Stan’s No Tubes and Orange Seal offer reliable sealants that create a strong seal and can fix small holes on the go.
2.3 Tire Levers
Though tubeless tires are easier to mount than their inner-tube counterparts, you’ll still need a set of tire levers to remove and replace the tire. Look for levers that are strong, lightweight, and made from durable materials like plastic or nylon to avoid damaging the rim or tire.
2.4 Tubeless Tire Pump
Inflating a tubeless tire can be a challenge due to the need to seat the tire bead properly. A tubeless-specific tire pump with a high-pressure setting will make this process much easier. Some pumps also feature a “booster” function that delivers a large burst of air, helping to seat the tire more effectively.
2.5 Rim Tape
Rim tape is essential to creating an airtight seal on the rim. It’s used to cover the spoke holes and prevent leaks. Make sure to choose rim tape that fits the width of your rim and is compatible with tubeless setups. The tape should be applied carefully to avoid gaps that could cause air loss.
3. Step-by-Step Guide to Setting Up and Adjusting Tubeless Tires
Setting up tubeless tires may seem daunting, but with the right tools and a methodical approach, it’s quite manageable. Follow these simple steps to set up your tubeless tires properly:
3.1 Step 1: Prepare the Rim
First, clean the rim thoroughly to remove any dirt or debris. Apply a layer of rim tape over the spoke holes, ensuring there are no gaps. This is the most critical step in ensuring an airtight seal.
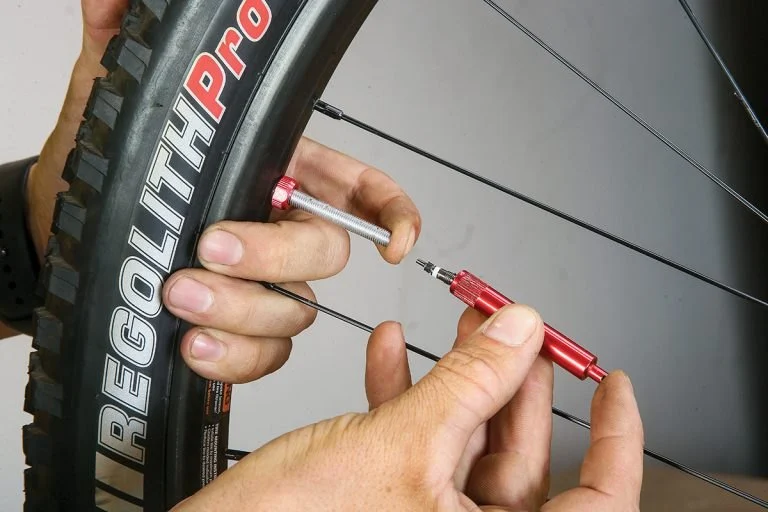
3.2 Step 2: Install the Tubeless Valve
Once the rim is prepped, install the tubeless valve. Tighten the valve to ensure it’s secure and properly seated. Be sure to check that the valve core is removable so that you can add sealant later.
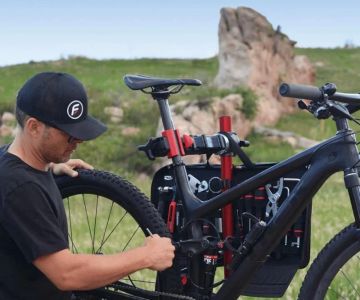
3.3 Step 3: Mount the Tire
Mount the tubeless tire onto the rim. This may require some patience as you work the tire onto the rim, especially if it’s a tight fit. Use tire levers if necessary, but avoid damaging the rim or tire. Ensure the tire bead is fully seated along the entire rim circumference.
3.4 Step 4: Add Tire Sealant
Once the tire is mounted, remove the valve core and add the recommended amount of tire sealant. Swirl the tire to ensure the sealant coats the inside of the tire evenly. Reinstall the valve core, and you’re ready to inflate.
3.5 Step 5: Inflate the Tire
Use a tubeless tire pump to inflate the tire. If the tire bead isn’t seating properly, give the tire a few taps or use the pump’s booster function to create a burst of air that will help seat the tire. Once the bead is seated, inflate to the recommended pressure and you’re all set!
4. Maintaining Your Tubeless Tires: Tools You Need
Maintaining tubeless tires requires periodic checking and adjusting. Here are the tools you’ll need to keep your tubeless setup in top shape:
4.1 Pressure Gauge
Regularly checking your tire pressure is crucial for optimal performance. A good tire pressure gauge helps you monitor the PSI, ensuring your tires are always at the right pressure for your riding conditions.
4.2 Sealant Refill Kit
Over time, tire sealant can dry out or lose its effectiveness. Keep a sealant refill kit on hand to top up your tire’s sealant when necessary. Most sealants last between 2 to 6 months depending on riding conditions.
5. Tips and Tricks for a Perfect Tubeless Setup
Here are some additional tips for ensuring a perfect tubeless tire setup:
5.1 Tip 1: Use a Leak Detector
If you're unsure about whether your tubeless tire is holding air properly, use a leak detector spray. This will help identify any small leaks in the tire, allowing you to patch them up before your next ride.
5.2 Tip 2: Check for Punctures Regularly
Even though tubeless tires are designed to self-seal small punctures, it’s still a good idea to inspect your tires regularly for large punctures or damage. If a puncture isn’t sealed by the tire sealant, you may need to replace the tire or apply a patch.
In conclusion, setting up and maintaining tubeless tires doesn’t have to be difficult. With the right tools and a little practice, you can enjoy the benefits of tubeless tires for years to come. For more recommendations on products, tools, and services related to cycling, visit Cycling Guider to find the best options for your needs.


 UrbanVolt Cycles Shop0.0 (0 reviews)
 Heritage Cycles4.0 (102 reviews)
 Tomten Biketown4.0 (127 reviews)
 New Hope Cyclery4.0 (62 reviews)
 Stoked Cycles4.0 (10 reviews)
 Frank's Bike Shop3.0 (90 reviews)
 How to Teach Kids to Ride a Bike: A Step-by-Step Guide for Parents
 Tips for Riding on Busy City Streets: Smart Strategies for Urban Cyclists
 Best US National Parks for Mountain Biking: Ride Epic Trails Across America
 Best Aero Helmets for Time Trials and Racing
 How to Clean and Lubricate Your Bike Chain Like a Pro
 10 Must-Have Items for Long-Distance Cycling Trips