
- what-you-need-to-know-about-chain-waxing
- 1-what-is-chain-waxing
- 2-benefits-of-chain-waxing-over-traditional-lubricants
- 3-how-to-prepare-your-bike-chain-for-waxing
- 4-step-by-step-how-to-wax-a-chain
- 5-common-mistakes-to-avoid
- 6-real-world-cyclist-experiences
- cycling-guider-for-the-right-tools
1. What You Need to Know About Chain Waxing
Chain waxing has grown rapidly in popularity among cyclists of all levels, from weekend riders to pro racers. But what exactly is chain waxing, and why are so many enthusiasts making the switch from traditional chain oil? Understanding the advantages—and the correct process—can make a significant difference in your bike’s longevity and performance.
2. What Is Chain Waxing?
2.1 A Clean Alternative to Greasy Lubes
Chain waxing involves immersing a bicycle chain in melted paraffin wax, often mixed with additives like PTFE or molybdenum. Unlike typical lubricants that attract dirt and grime, a properly waxed chain stays dry and clean, reducing friction and wear.
2.2 Why Cyclists Are Making the Switch
Once considered a niche technique, chain waxing has become mainstream due to its low maintenance needs and long-term cost efficiency. Riders also appreciate the whisper-quiet ride and better power transfer that a waxed chain offers.
3. Benefits of Chain Waxing Over Traditional Lubricants
3.1 Longevity and Performance
A waxed chain typically lasts 2–3 times longer than one maintained with oil-based lubes, especially in dry or dusty environments. Because wax doesn’t attract dirt, there’s significantly less abrasive wear on drivetrain components.
3.2 Cleaner Ride, Less Maintenance
One of the most appreciated benefits is cleanliness. No more greasy pant legs or dirty fingers. Waxing requires less frequent application and eliminates the need to constantly degrease your drivetrain.
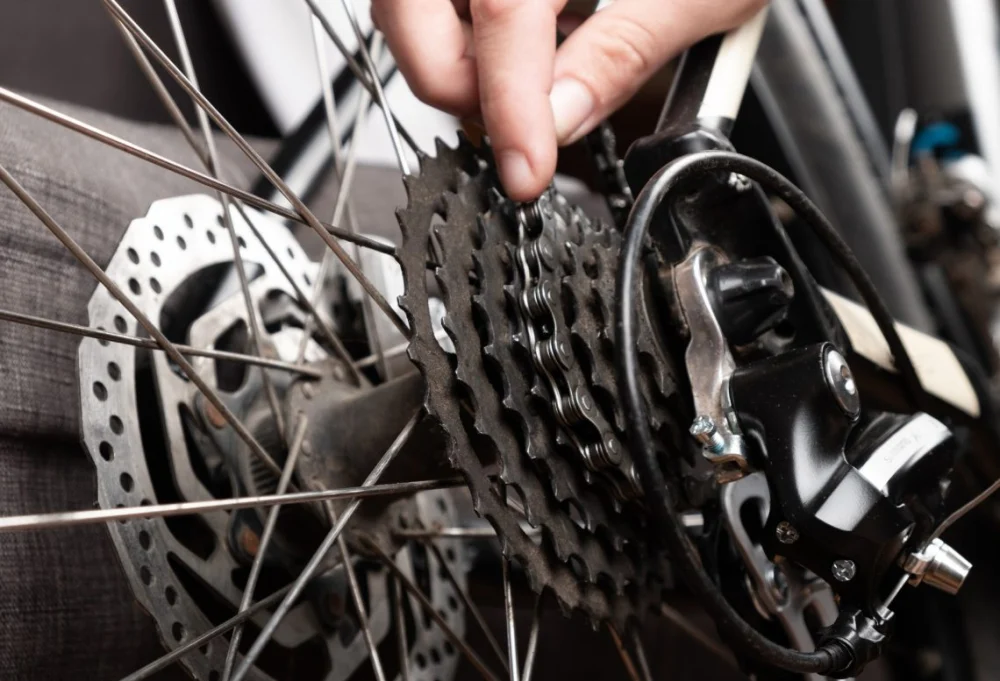
4. How to Prepare Your Bike Chain for Waxing
4.1 Start With a Thorough Degreasing
Before waxing, every bit of factory grease or old lube must be completely removed. Use a solvent like mineral spirits or an ultrasonic cleaner to get deep into the rollers. This step is crucial—any leftover oil will prevent wax from properly adhering.
4.2 Rinse and Dry Thoroughly
Once degreased, rinse the chain in hot water and allow it to dry completely. Some cyclists use a hair dryer or leave the chain in the sun to speed up drying.
5. Step-by-Step: How to Wax a Chain
5.1 Tools You’ll Need
- Crockpot or slow cooker- Paraffin wax blocks or cycling-specific chain wax- A hanger or wire to dip and lift the chain
5.2 The Waxing Process
Melt the wax completely in the pot. Submerge the clean, dry chain and let it sit for 10–15 minutes, agitating occasionally. When removed, hang it to cool and harden. Once dry, flex each link gently to break up the wax and ensure smooth articulation.
6. Common Mistakes to Avoid
6.1 Skipping the Cleaning Stage
Many first-time waxers fail to adequately degrease their chain, resulting in poor wax adhesion and underwhelming performance. A half-cleaned chain is worse than none at all.
6.2 Re-waxing Too Late
Don’t wait until your chain is making noise or shifting poorly. Re-wax before issues arise—usually every 300–400 miles depending on terrain and conditions.
7. Real-World Cyclist Experiences
Jake, a gravel racer from Arizona, shared how switching to chain waxing before the Unbound Gravel 100 reduced his drivetrain wear dramatically. After the race, his cassette looked nearly untouched despite punishing dust and mud. Stories like his are becoming common, reinforcing why chain waxing is more than a trend—it's a long-term cycling upgrade.
8. Cycling Guider for the Right Tools
If you're considering waxing your chain but aren’t sure where to start, Cycling Guider has product guides, user reviews, and trusted recommendations to make your transition smooth. From wax formulas to cleaning kits, you’ll find everything needed to upgrade your drivetrain maintenance.


 Billet BMX5.0 (2 reviews)
 Far East Children Bicycle Factory1.0 (1 reviews)
 Archer Motorsports, Inc.4.0 (8 reviews)
 YEP Bike Works4.0 (55 reviews)
 Gorham Bike & Ski4.0 (498 reviews)
 Alchemy Bikes4.0 (37 reviews)
 How to Teach Kids to Ride a Bike: A Step-by-Step Guide for Parents
 Tips for Riding on Busy City Streets: Smart Strategies for Urban Cyclists
 Best US National Parks for Mountain Biking: Ride Epic Trails Across America
 Best Aero Helmets for Time Trials and Racing
 How to Clean and Lubricate Your Bike Chain Like a Pro
 10 Must-Have Items for Long-Distance Cycling Trips