
- why-aero-position-matters-in-cycling
- fundamentals-of-aero-position
- optimizing-your-aero-position
- real-world-impact-of-aero-positioning
- common-mistakes-to-avoid-in-aero-position
- getting-started-and-finding-the-right-gear
1. Why Aero Position Matters in Cycling
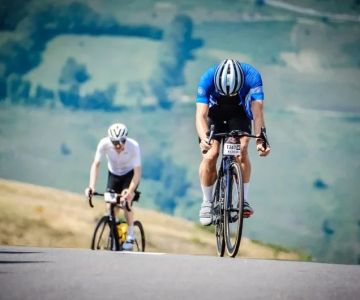
Whether you're a seasoned triathlete, a time trial enthusiast, or a weekend warrior chasing KOMs, understanding what you need to know about aero position is key to unlocking free speed. Aero position isn't just a pro-only concept—it's the foundation of riding faster with less effort by minimizing aerodynamic drag, which accounts for up to 80% of resistance at higher speeds.
Every cyclist has felt that wall of wind. Shaving even a little off your frontal surface area can make a noticeable difference. And as many riders have discovered, this isn’t about having an expensive bike—it's about knowing how to position your body.
2. Fundamentals of Aero Position
To truly grasp the benefits of aero position, we need to start with its core elements. These basics form the starting point for every refinement you'll make later.
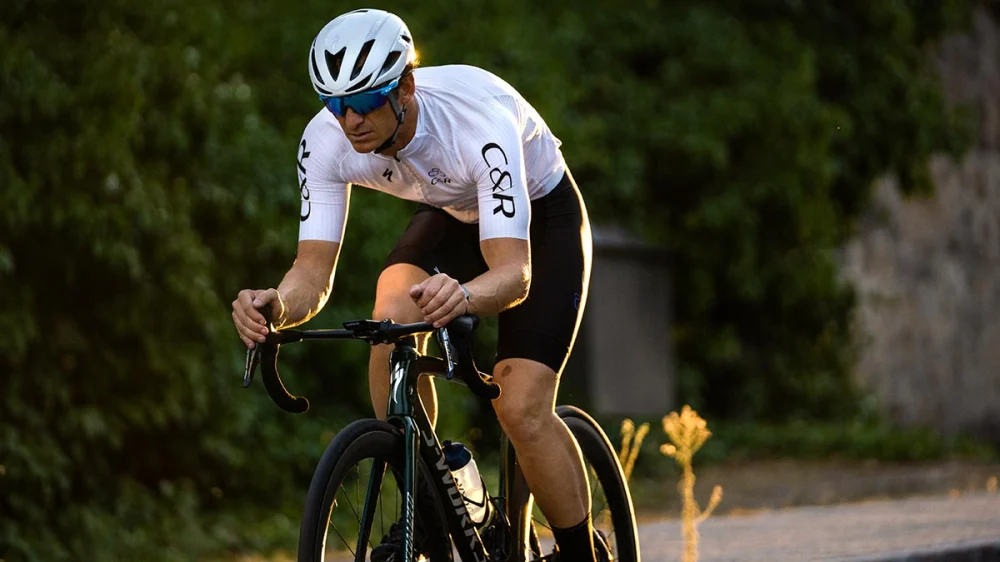
2.1 Lowering Your Torso
The cornerstone of aerodynamics is getting low. Bringing your chest closer to the top tube reduces drag dramatically. However, this must be balanced with comfort and sustainability—there's no point in being aero if you can’t hold the position for long.
2.2 Tucking the Elbows
Narrowing your profile is just as critical as lowering it. Tucked-in elbows reduce the wind-facing surface area. This is why many time trial bars are designed to keep the arms aligned with the body, creating a more compact silhouette.
2.3 Flat Back and Neutral Neck
A flat back is a hallmark of a well-trained aero rider. Equally important is keeping your head slightly down, with the eyes looking forward. It may feel unnatural at first, but it’s essential for long-term efficiency and injury prevention.
3. Optimizing Your Aero Position
While the fundamentals lay the groundwork, fine-tuning your position is where real performance gains happen. This process involves professional fitting, experimenting with gear, and listening to your body.
3.1 Professional Bike Fit vs. DIY Tweaks
Getting a professional bike fit can be a game-changer. Fitters use motion capture and wind tunnel data to dial in every angle. But even without that, simple adjustments like stem length, saddle tilt, and arm pad height can help improve aerodynamics.
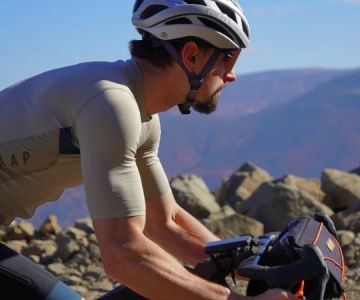
3.2 Using Aero Bars Correctly
Clip-on aero bars are a cost-effective way to access an aerodynamic position. The key is setting them up so your forearms are level and your shoulders relaxed—not hunched. Improper positioning can negate their benefits and cause discomfort.
3.3 Testing and Feedback
Some riders use power meters to compare watt output across different positions. Others film themselves or use mirror checks. Even small adjustments can yield major savings over long distances.
4. Real-World Impact of Aero Positioning
The results of good aero positioning speak for themselves. During the 2023 Ironman World Championship, several age-group winners credited not just their training but their aerodynamic setups as a key factor in shaving minutes off their bike splits.
On a more personal level, I remember switching to a refined aero position before my first 40km time trial. I didn’t upgrade my bike—just repositioned my cockpit and practiced holding the position. I ended up clocking nearly 3 minutes faster than the previous attempt. The only change? Better positioning.
5. Common Mistakes to Avoid in Aero Position
While optimizing your aero position can be transformative, there are pitfalls that can undo your gains or even cause injuries.
5.1 Ignoring Core Strength
Many riders forget that maintaining a low, aero posture requires core stability. Weak core muscles lead to poor form and pain. Incorporating planks, glute bridges, and back exercises can significantly improve your ability to hold an aero position comfortably.
5.2 Overextending Reach
Trying to look ‘pro’ by stretching too far forward can lead to back strain and loss of control. Your arms should be slightly bent, with weight evenly distributed—not locked out and overextended.
5.3 Neglecting Road Safety
Being aerodynamic doesn't mean ignoring safety. Riding in traffic with your head down and vision limited is dangerous. Train in controlled environments and raise your head regularly to scan the road.
6. Getting Started and Finding the Right Gear
Ready to transform your cycling experience? Start by experimenting with position changes during training rides. Track your average speed and perceived effort. As you refine your setup, you’ll find yourself riding faster without pushing harder.
Looking for aero bars, skinsuits, or time trial helmets that truly complement your setup? Visit Cycling Guider—we offer expert-tested gear recommendations, fitting tips, and product reviews to help you reach your full potential in the saddle.
Remember, achieving the perfect aero position isn’t about mimicking the pros—it’s about finding the most aerodynamic posture you can maintain for the longest time, safely and comfortably.


 Billet BMX5.0 (2 reviews)
 Far East Children Bicycle Factory1.0 (1 reviews)
 Archer Motorsports, Inc.4.0 (8 reviews)
 YEP Bike Works4.0 (55 reviews)
 Gorham Bike & Ski4.0 (498 reviews)
 Alchemy Bikes4.0 (37 reviews)
 How to Teach Kids to Ride a Bike: A Step-by-Step Guide for Parents
 Tips for Riding on Busy City Streets: Smart Strategies for Urban Cyclists
 Best US National Parks for Mountain Biking: Ride Epic Trails Across America
 Best Aero Helmets for Time Trials and Racing
 How to Clean and Lubricate Your Bike Chain Like a Pro
 10 Must-Have Items for Long-Distance Cycling Trips